Overview
You can use the media that you record or upload into Kaltura to create video quizzes. If you choose to make the quizzes graded, the grades are automatically sent back to the Canvas Gradebook.
Instructions
To create a quiz
- Login to a Canvas
- Choose one of the Courses
- Select My Media from the blue menu items on the left side of the screen.
- Select Add New > Video Quiz.
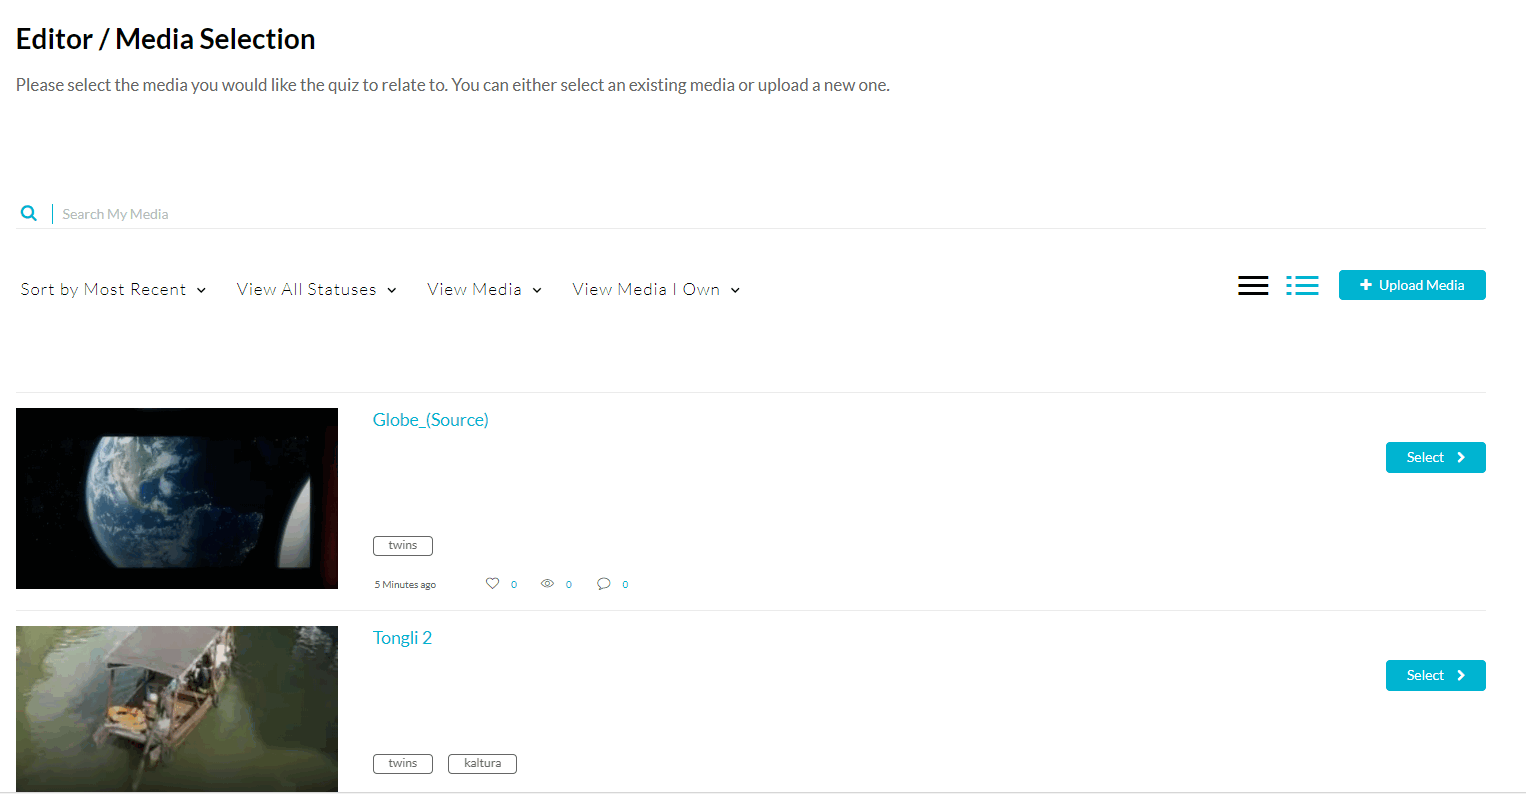
The Editor / Media Selection page is displayed.
NOTE: You may create or modify a quiz from Audio and Public YouTube entries (privately listed Youtube videos cannot integrate with Kaltura). You may not create quizzes from Live and Image entries.
- Click Select next to an existing media you want to create a Quiz from.
or, click Upload New Media, to upload a new media for your Quiz.
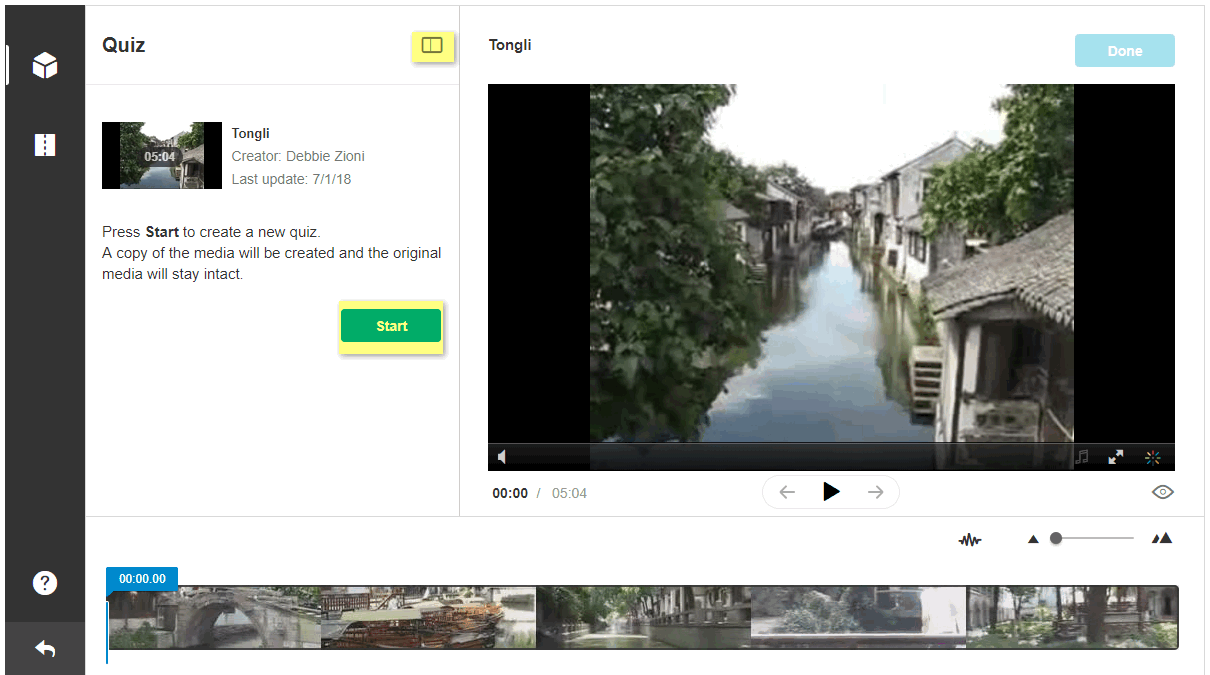
The Kaltura Editor is launched, and the Quiz tab is selected with your chosen media.
- Click Start to create the Quiz.
A copy of the media is created, and the original media is retained.
-
Use the Expand/Minimize icon to minimize/expand left pane to allow a cleaner view.
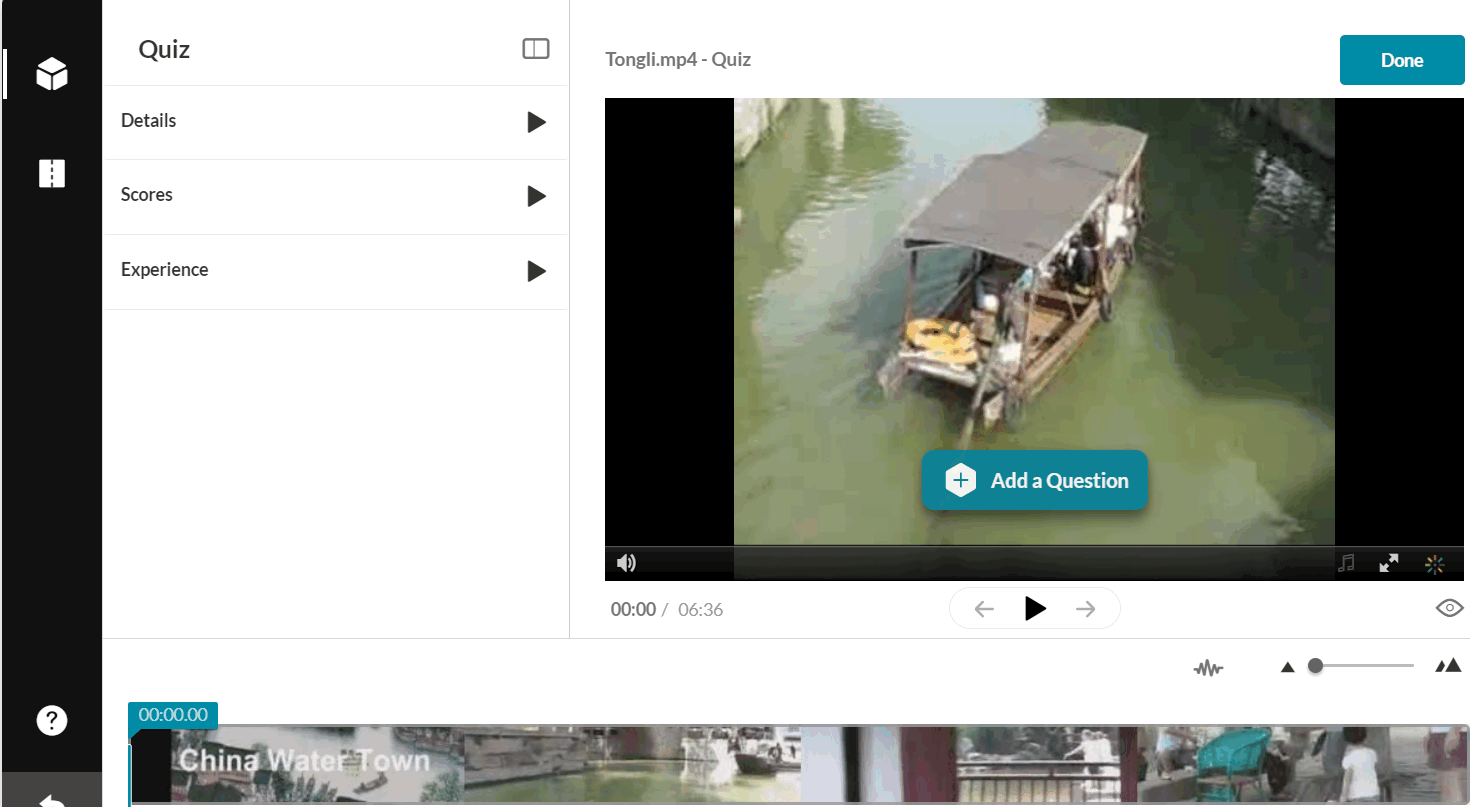
Optional - Steps 6 through 8 include all options in the Quiz Editor with their default values. Open each section to modify the default values for the selected media entry.
- Click the Details tab. Default values are displayed. You may Revert to defaults at any time.
|
Upon Submission:
|
Resulting Display for the end-user
|
|
Quiz Name
|
Quiz Name
|
|
Welcome Message
|
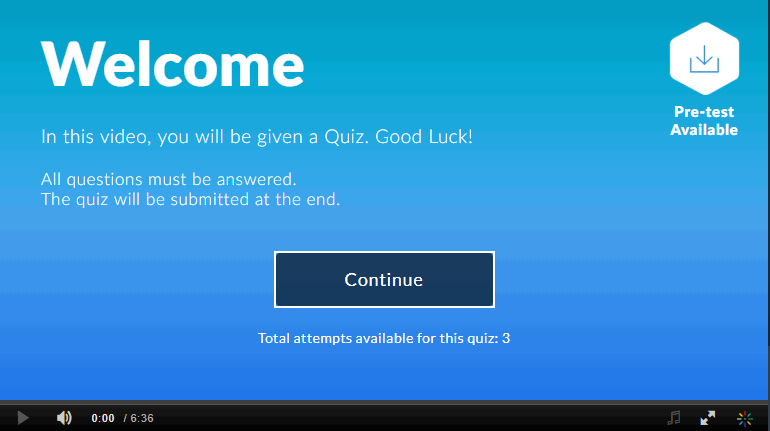
The message that is displayed on the first screen of the quiz.If you disable the Welcome message display, viewers will not be able to see the Pre-test question list.
|
|
Allow Download of Questions List\r\n
|
Allow viewers to download the list of questions before starting the quiz.
|
|
Instructions
|
The following text will be displayed:
"All questions must be answered. The quiz will be submitted at the end."
|
- Click the\r\n Scoring tab to set or modify the scoring options. Default values are displayed. You may Revert to defaults at any time.
|
Upon Submission:
|
Resulting Display for the end-user
|
|
Allow Multiple Attempts
|
Allow viewers to take the quiz more than once. The minimum is 2 attempts per quiz.
|
|
Do Not Show Scores
|
A 'Thank You' message will display after submitting the quiz. No scores will be presented to the quiz-taker.
|
|
Show Scores
|
Your viewers will see the quiz score page after the quiz is submitted.
|
|
Include Answers
|
Your viewers will be able to see correct/incorrect answers, as well as the correct answer’s rationale if you chose to add it during the quiz creation.
|
- Click the\r\n Experience tab to set or modify the experience options. Default values are displayed. You may Revert to defaults at any time.
|
Option
|
Resulting Display for the end-user
|
|
Allow answers change
|
Your viewers will be able to change an answer before submitting the entire quiz, during review mode.
|
|
Allow Skip
|
Users will be presented with the "Skip for Now" button.
|
|
Do not allow skip
|
Users must submit an answer before proceeding forward.
|
Click Save after each time you modify any option.
Adding Questions and Answers to Your Quiz
After you click the Start button or select to edit an existing quiz, the quiz question icon and text Add a Question is displayed on the player.
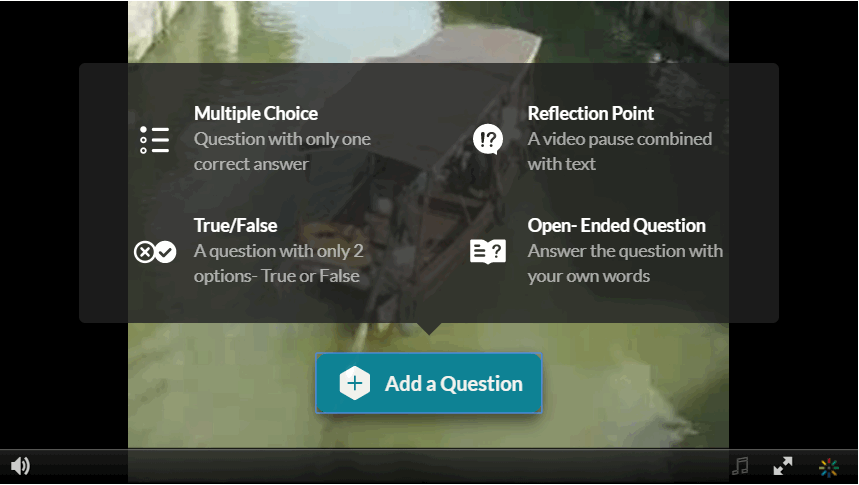
Click Add a Question to:
- Select the question type.
- Create Hints
- Create Rational (Why)
It is highly recommended that you place your final question close to the end of the video. After every question, the video continues from the point the video stopped before the question). Placing the final question near the end keeps the user engaged until the video topic is completed.
To create the quiz questions and answers
- Play the video or move the media’s real-time marker to the desired point in the video’s timeline.
- Select a question type.
The following question types are available:
- Multiple Choice - Question with only one correct answer.
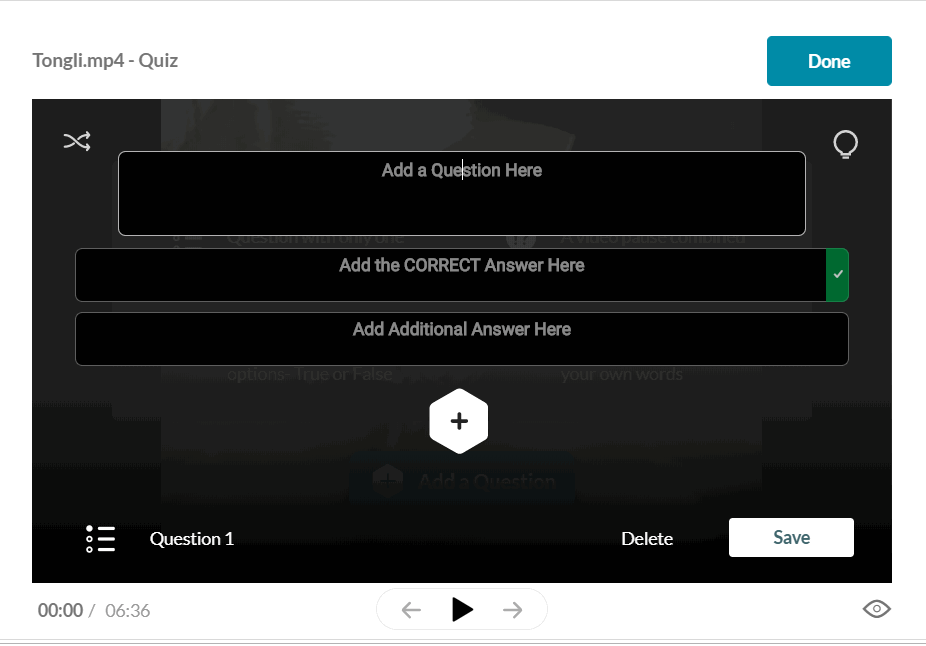
- True/False
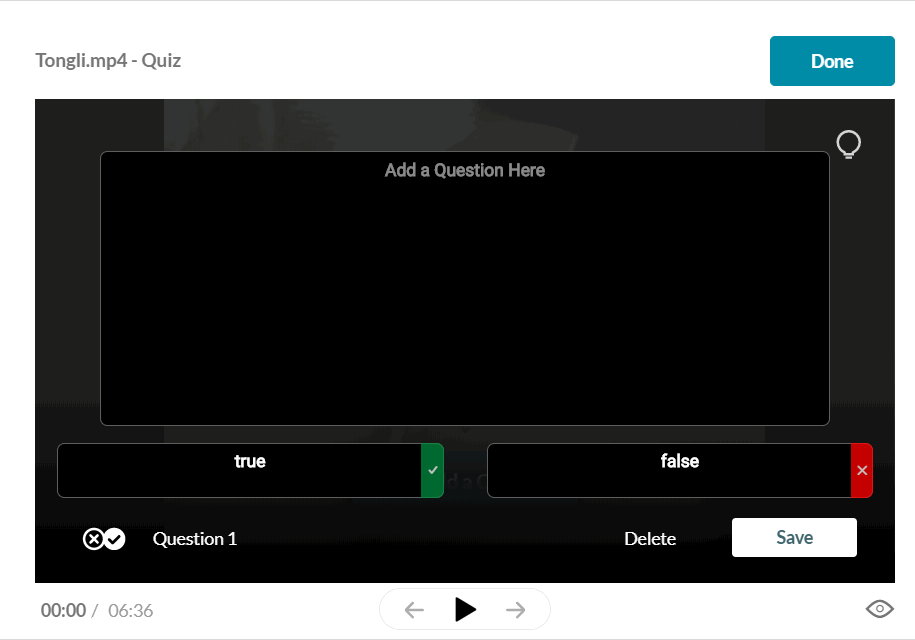
- To delete an answer, click on the x near the answer. The correct answer cannot be deleted, only modified.
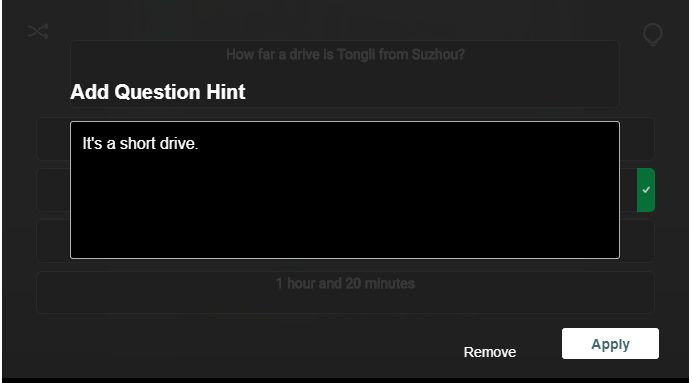
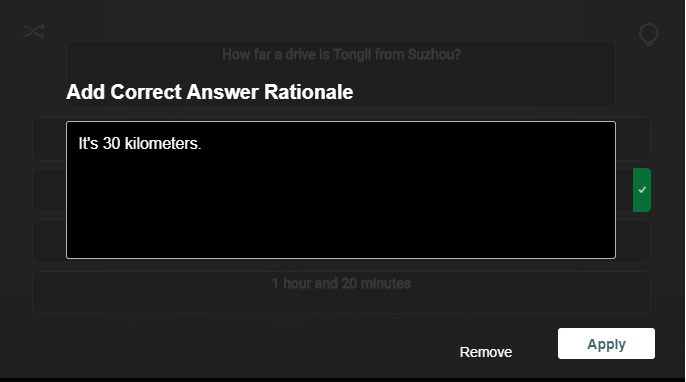
- (Optional) Before you save the question, you may add a hint to the correct answer. When you finalize the quiz, you may add the Why rational.
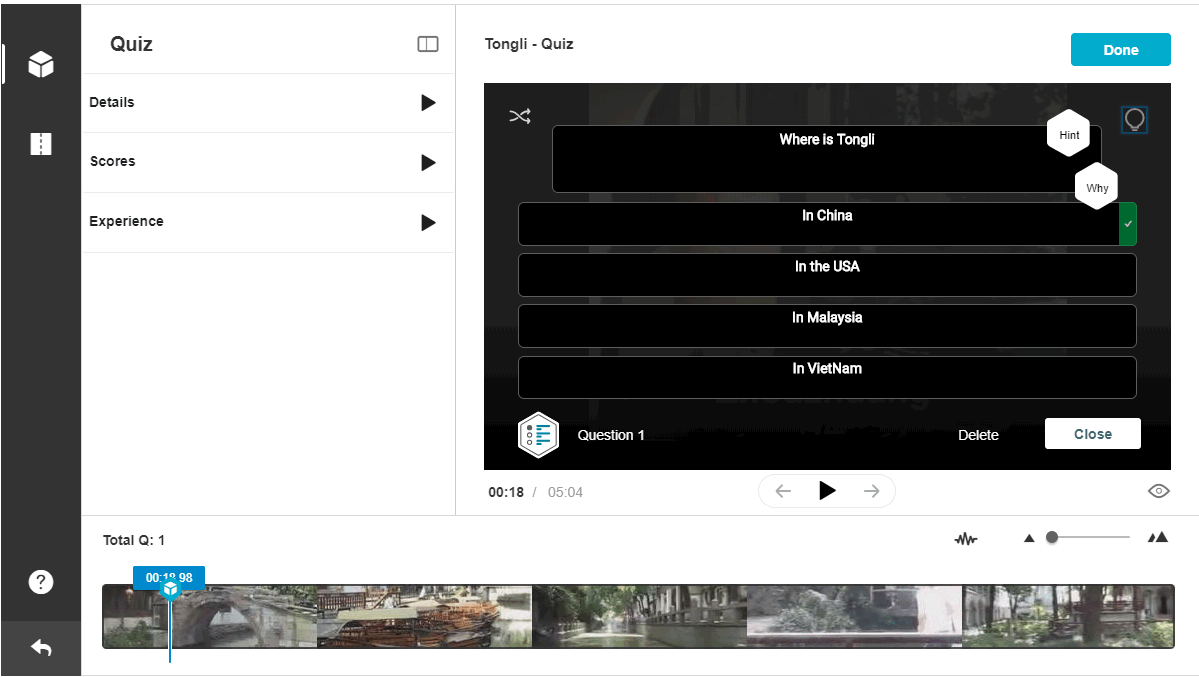
- Optional) Click the Lamp Icon. The Hint and Why icons are displayed. A hint contains additional information the user can choose to see while answering the question. It does not affect the score. The “Why” icon is the rationale of the correct answer, which can explain to your users why this is the correct answer.
- Click Hint and enter a Hint. Click Apply or Remove. If the question has a hint a small ‘V’ icon is displayed in the Hint icon.
- Click Why and enter the rational. Click Apply or Remove. The Why comes up only at the end of the quiz and only when the option to Include Answers is checked in the Scoring tab.
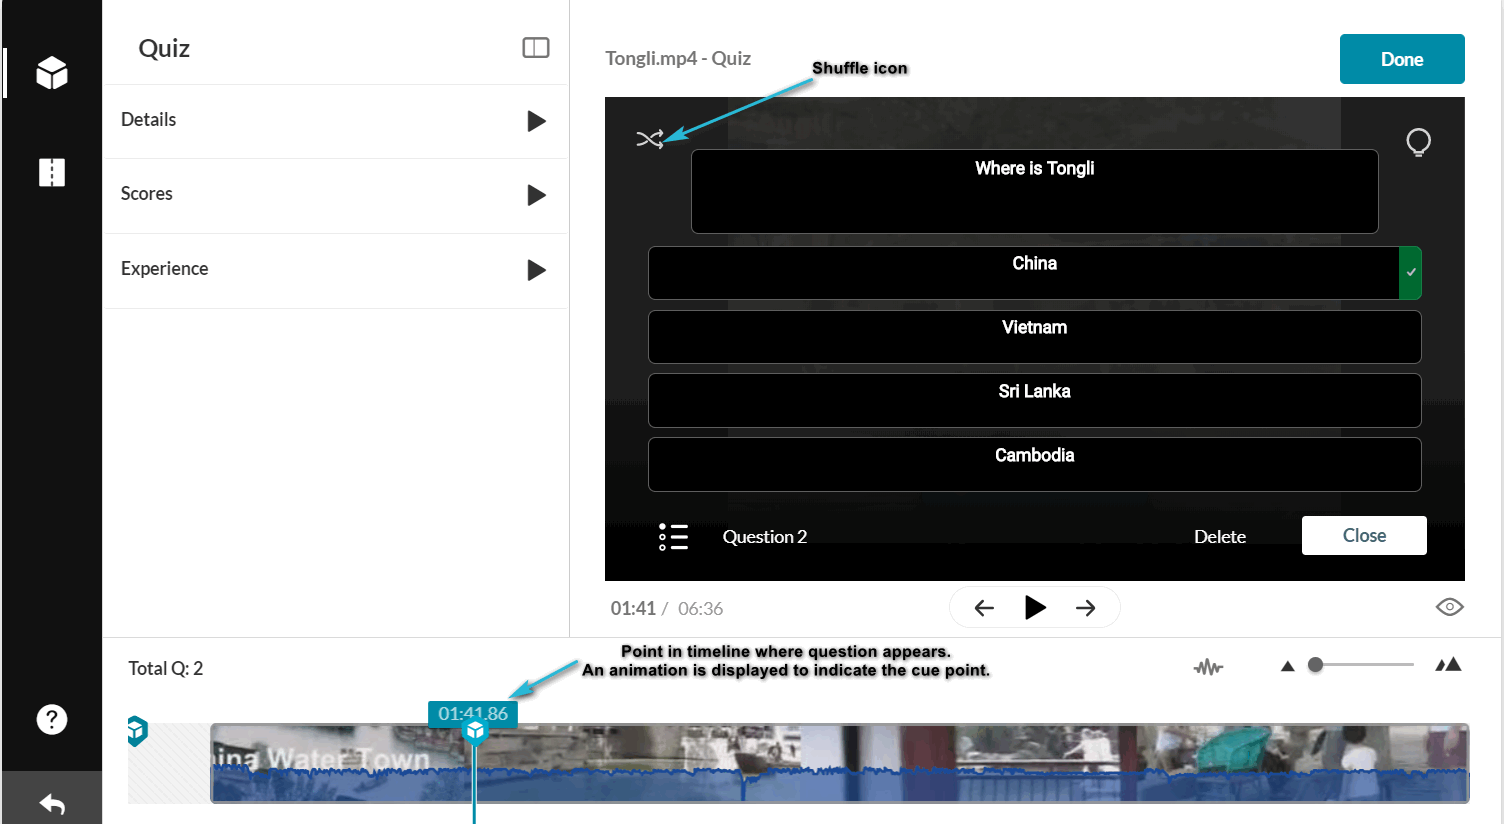
- Click Save to save the question or Delete to delete the question.The question is saved with the question indicator on the timeline. An animation is displayed pointing to the cue point in the time line where the question will be displayed.
- Move the media’s real-time marker to the desired point in the video’s timeline to add additional questions and repeat the steps in this section.
- Click Done when done. The Editor screen is displayed with the quiz questions displayed as cue points on the timeline. In this example, the quiz has 3 questions. The total number of questions is also indicated on top of the timeline.
To Preview the quiz
- Click on the Eye icon below the player.
- Click Continue to see the quiz you created. Click Escape to exit Preview mode.

- Play the video and be certain that the questions and answers are correct and in their proper places in the media. Click on the question cue point to jump to the question.
To edit a quiz
- While still in the quiz, click Edit Quiz.
- Click on the question cue point on the timeline.
- Enter your changes on the quiz editor screen, and Save.
- Click on the x near the answer to delete an answer. Click on the 3 dots to shuffle the order of the answers. Click Delete to delete the entire question.
- To Preview the quiz, click the Eye icon below the player.
- When you are done creating or editing the quiz, click Done.
To view or continue editing your quiz
- Use the Edit tab to continue editing your quiz, or to trim or clip the media. You will see the question icons spread on the Timeline as a reference.
- Click “Go To Media” to view the quiz in your media list.
Viewing the Pre-Test
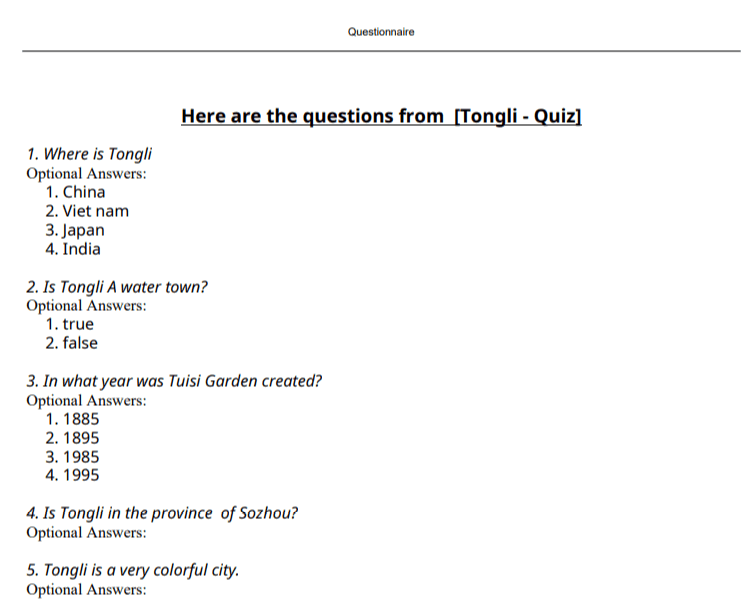
You can view all the questions and their possible answers before you take the actual quiz. The option Question List must be checked in the Experience tab.
Viewing the Pre-test is very useful to students or users that want to prepare the subject matter of the quiz ahead of time.
To view the questions before taking the quiz
- Login to Canvas
- Enter one of your courses
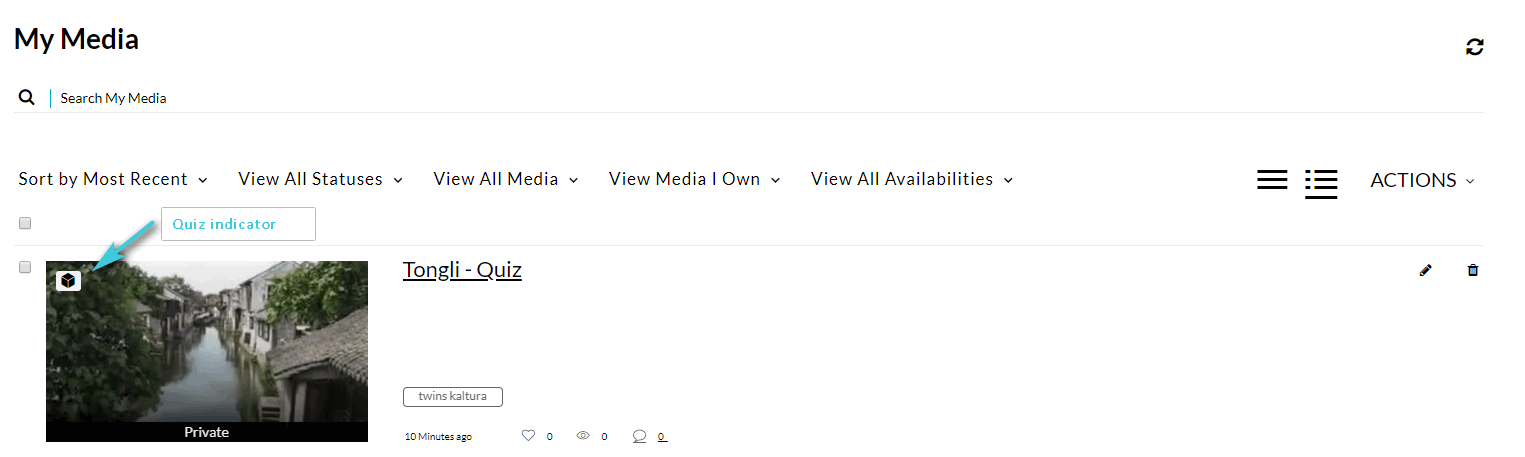
- Click on My Media
- Click on the quiz entry.
- Play the video.
- Click on Pre-test Available to open the questions and answers list in PDF format.
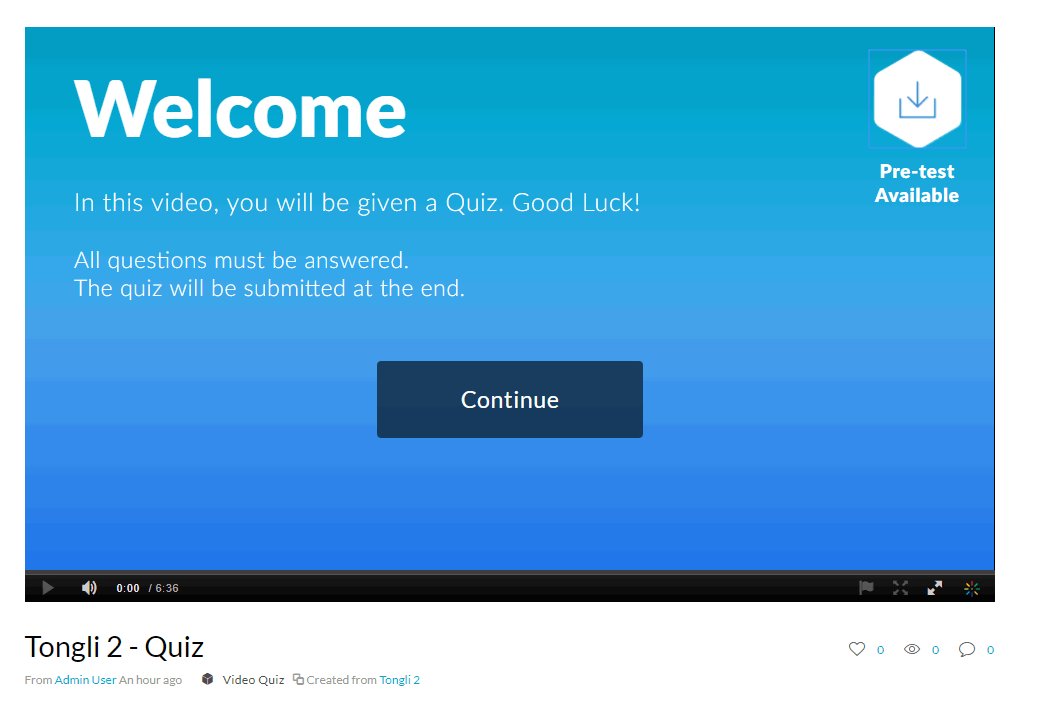
The questionnaire and possible answers are downloaded to your PC in PDF.
Questions? Need Help?
If you have questions or need some help, please let ITS know by submitting a Raven Solutions request.