Overview
Kaltura provides a basic video editor that allows users to trim and clip media that has been uploaded into their Kaltura Media space. Note: when you edit a video you are given the option to save the edited video as a separate copy.
Instructions
To get to the video editor,
- Go to My Media or Media Gallery.
- .Select the video you wish to edit.
- Click Actions (underneath the video).
- Choose the option: Launch Editor-This will bring open up the video editor.
- The option "Edit" is the Metadata editor. This allows you to edit things such as the title, description, add tags, or create a Publishing Schedule.
- If you have accidentally clicked "Edit" instead of Launch Editor, then the Launch Editor button will appear on the right side of the video.
Video Editor Window Layout
The Video Editor has three main areas:
- Left pane – Displays your media details. The left pane may be minimized by clicking the open/close left pane button.

- Right pane – Consists of:
- Media Player - The Kaltura Editor Player is defined in the Editor Module by your system administrator. Use it to Preview your timeline modifications.
- Real-Time Input
- Play/Pause/Skip to start/Skip to end Buttons
- Bottom pane – Includes the Timeline. The Timeline can be zoomed in/out to allow improved granulation of the timeline, and fine-tuning, and give a broader perspective when zoomed out.
The Timeline includes the following icons and tools:
- Redo icon - retracts to the last action you performed on the Timeline
- Undo icon - undoes the last action you performed on the Timeline
- Reset icon - resets the Timeline to its last saved state
- Real-time marke, with Quick Action and Time Code
- Set In/Out - use to set cue points on your timeline.
- Split - use to cut your segment at the selected point
- Fade In/Out icon - use to set fade in/out cue points on your selected segment
- Delete icon - use to cut the selected segment
- Zoom marker - use to enlarge the timeline display granularity
- Handlebars - Use to snap to a certain point on the video segment
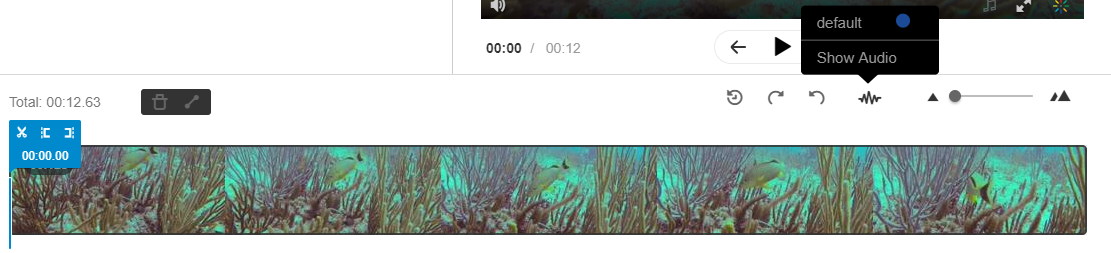
- Show/Hide Audio - show or hide the audio tracks on the timeline
- The total amount of the video duration - indicates the total amount of time of the video

To zoom in/out and reset the Timeline
- Drag the Zoom marker to the level of granularity you want to see. This naturally will increase the length of the visible Timeline, since more frames will be viewable.
- Click the Reset Icon – to reset the Timeline to its last saved state.
To show/hide audio tracks on the Editor timeline
- Click the Show /Hide Audio icon on the timeline. The audio display is removed from the timeline.
To advance/go back in small increments on the Editor timeline
Use the following keys:
- 1 Second Forward - Right arrow
- 1 Second Backward - Left arrow
- 10 Seconds Forward - Alt + Right arrow
- 10 Seconds Backward - Alt + Left arrow
Setting a Range
To trim media or to create a clip, you must first define the range you want to keep or make a clip from.
You can set the range in one of the following ways:
- Drag the handlebars of the start or endpoints with your mouse to set the range.
- Enter a start time or end time in the Real-Time Input field, and press Enter. The Real-Time marker will position itself on the timeline at the manually set time. You can then drag either handlebar on the Timeline edge to snap it to the real-time marker.
- Click anywhere on the Timeline, the Real-Time Marker will position itself there. Drag either Timeline edge to snap it to the real-time marker.
- Play the media, and pause on the desired time. the Real-Time Marker will position itself at that time. Drag either Timeline handlebar to snap it to the real-time marker.
When arrows are displayed on the Real-Time Marker, you can move the Real-Time marker on the timeline to a different position, either backward or forward.
Trimming a Media Item
Use the trimming tool to trim the start and/or end of your media. Trimming is only available to entitled users.
Trimming media will modify the source media permanently. Create a clip to trim a copy and preserve the original media in Kaltura.
To trim media
- Set the Range.
- Click Save to create a new media item.
Sample Use Case
Let's say you would like to trim off the first minute and last 30 seconds of the video.
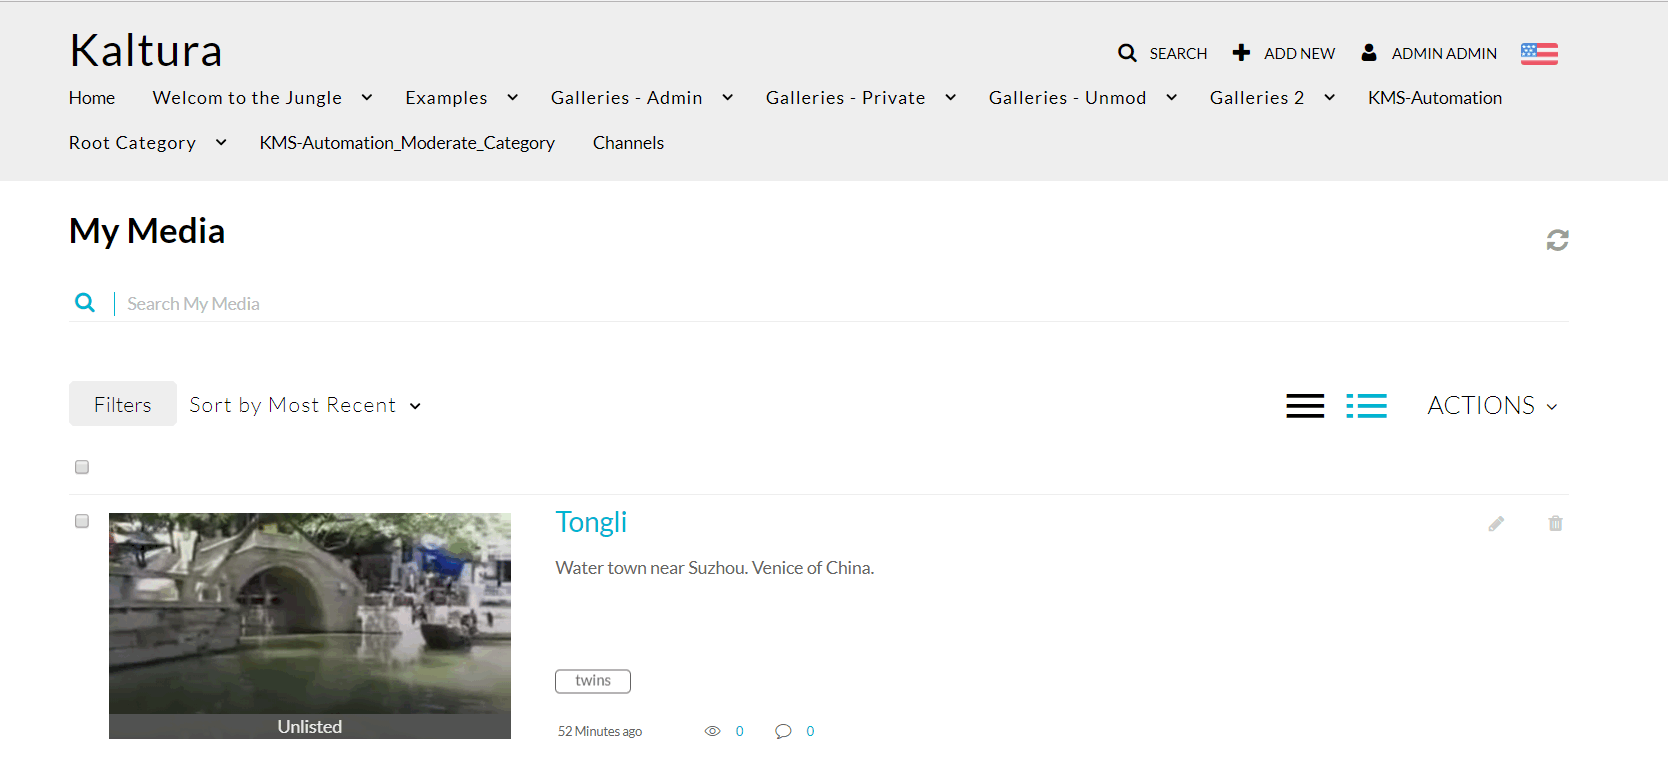
- Go to My Media and select the video you want to trim or create a clip from.
- Launch the Kaltura Editor.
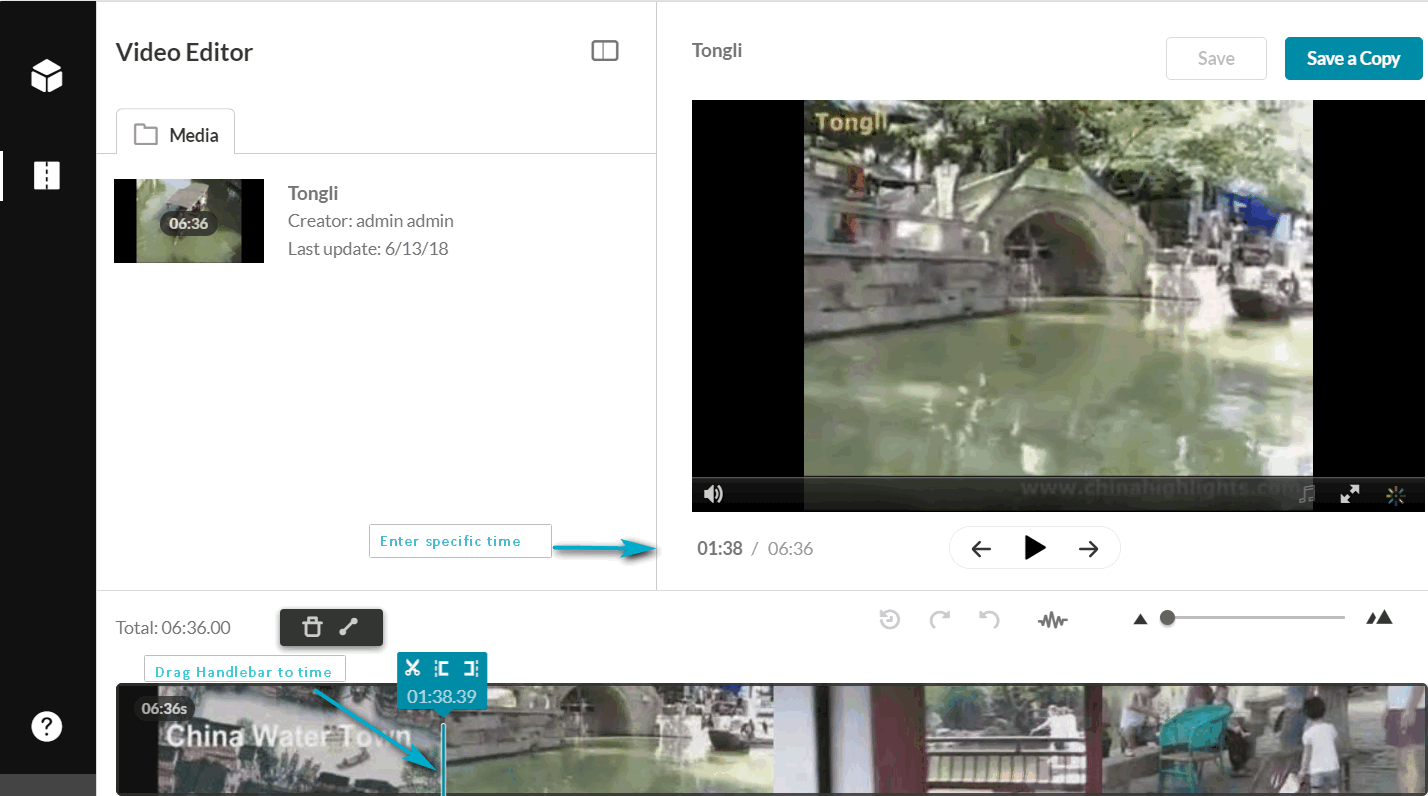
- In this example, the desired start time will be one minute thirty-eight seconds. Drag the handlebar to the 1.38 point on the video. You can also select to input the 1:38 time manually.
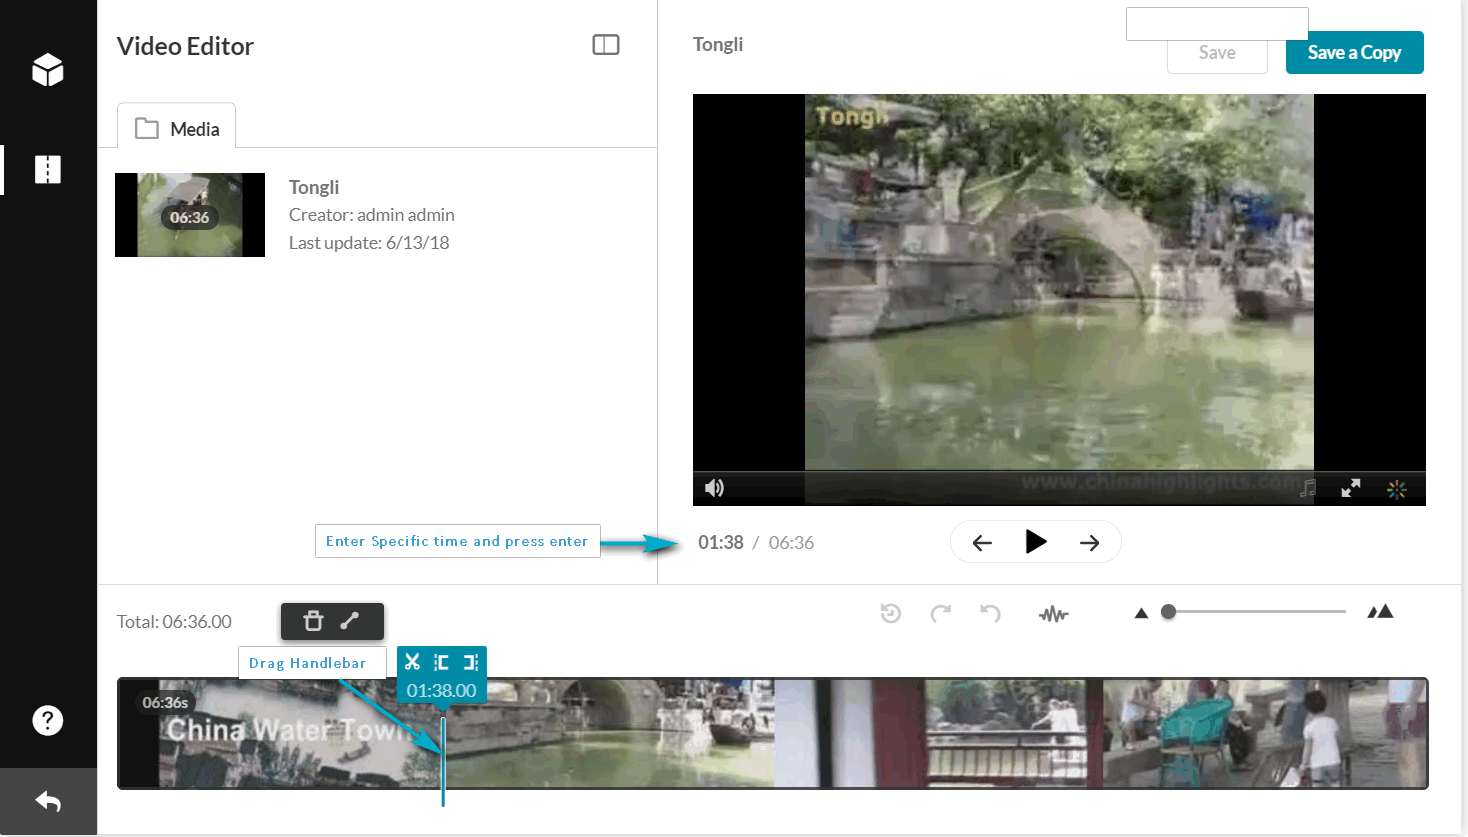
The manual input time syncs with Real-Time maker you set and vice versa.
- Drag the other end to the time mark 30 seconds less prior to the end and use the manual time input as a guide to the exact time.
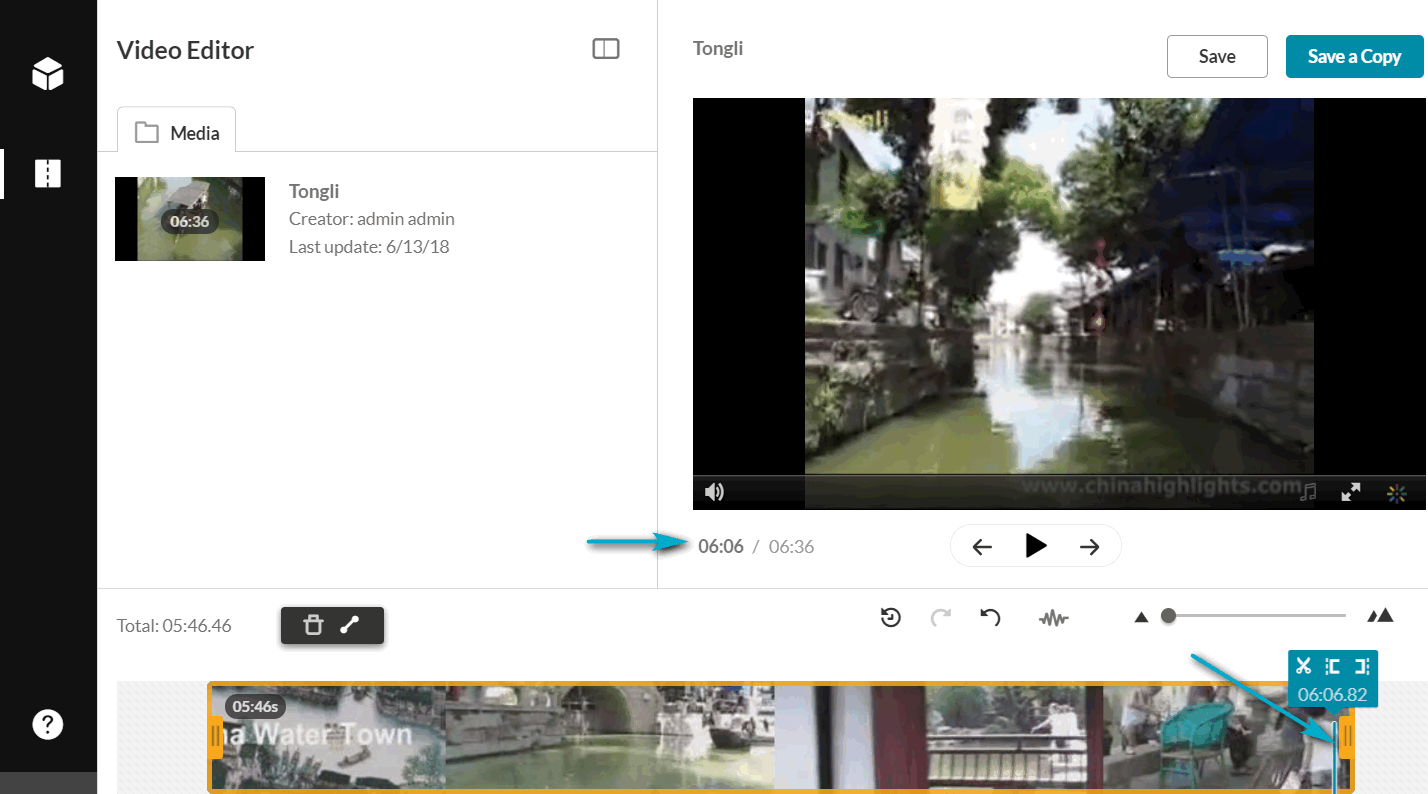
You now have the desired segment of the original video.
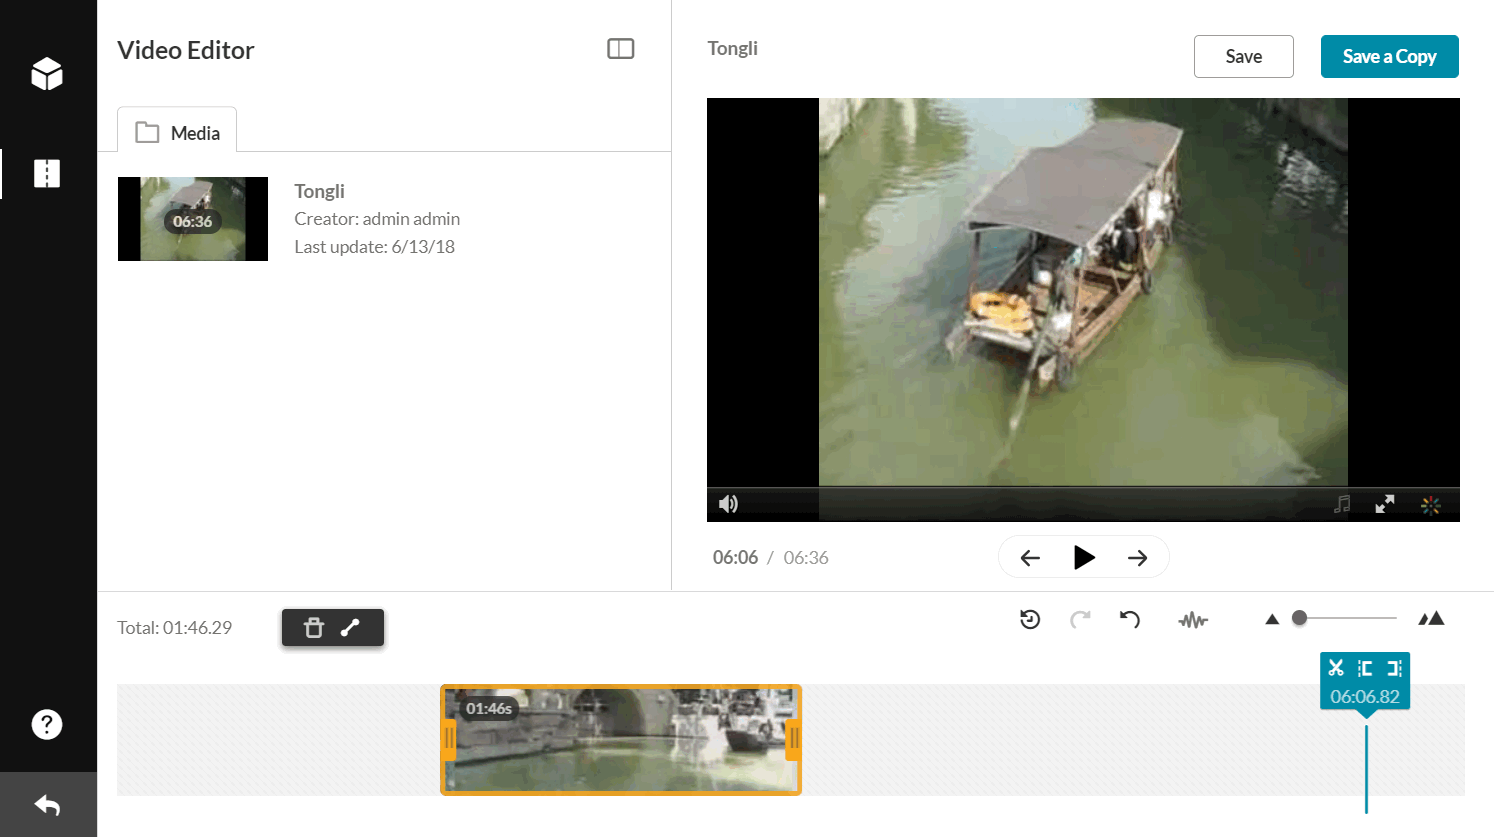
- (Optional) If you want to change the segment of the selected trimmed media to another segment on the timeline, (with the same amount of time) click on the thumbnail that you created and drag it to the desired frame on the Timeline. For example, if you want a one-minute segment, choose it and then you can move it elsewhere on the timeline.
The trimmed segment that you created for 1 minute is now on a different part of your media.

- Click Save. The following window is displayed:
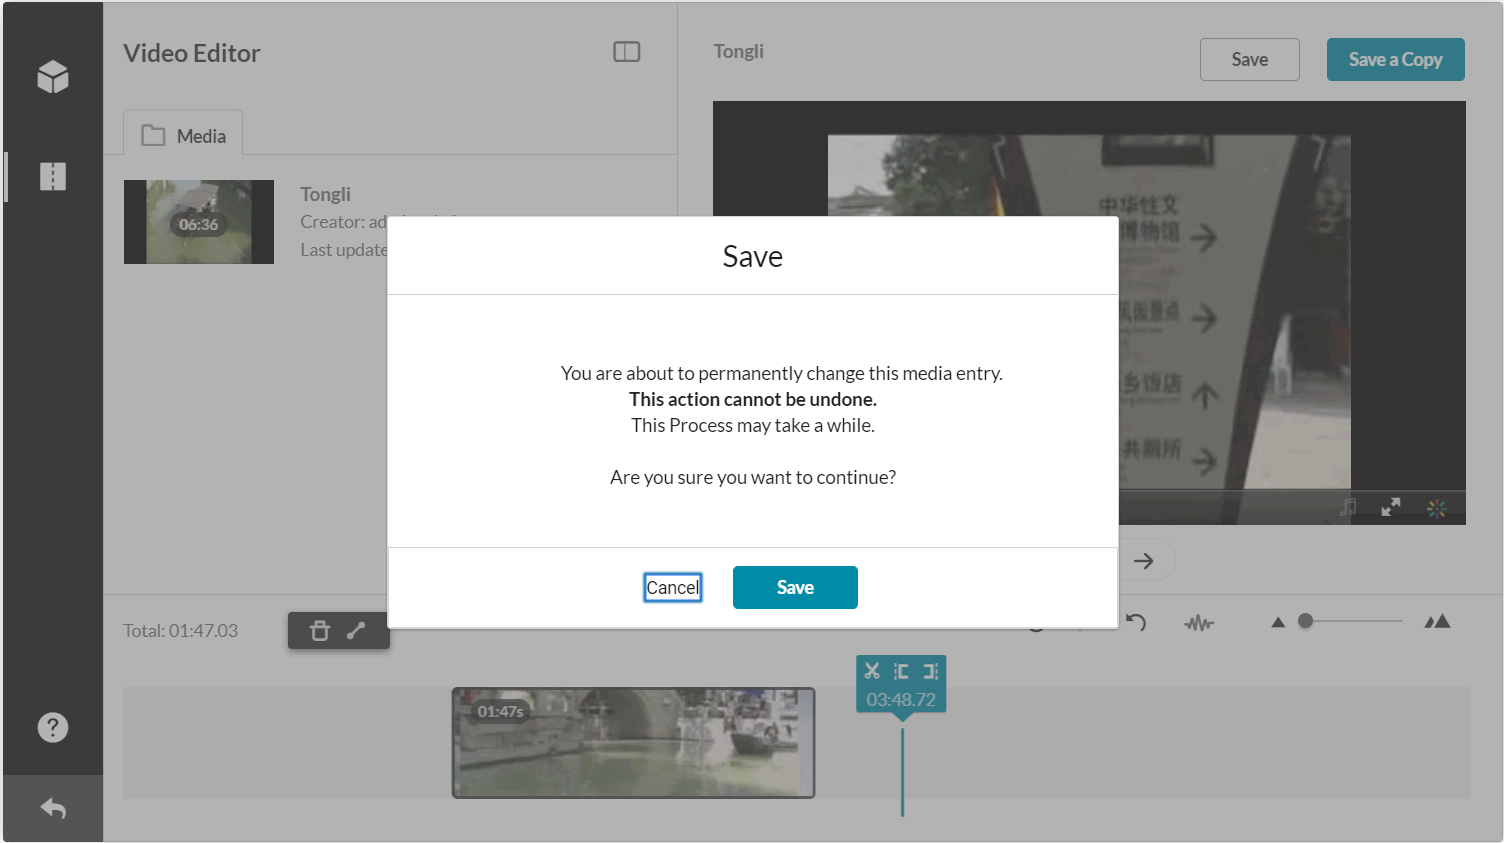
- Click Save.
A progress bar is displayed. And a message is displayed after your video is successfully saved.
- Click on the Exit icon to return to My Media.
Clipping a Media Entry
Only the owner or co-editor of a media entry can create clips from media.
For entitlements for clipping, the option Enable others to create clips must be checked.
The Real-Time marker is always in sync with Manual Time Input (below the player).
To create a clip
- Set the Range.
- Click Save a Copy (clip) to create a clip. Saving a copy creates a copy and the original media is unchanged.
Clipping and Trimming Content with Multiple Streams or Multiple Audio Tracks
Clipping and trimming is performed on all the streams or audio tracks that may exist in the entry, simultaneously. The timeline may be used as a visual aid to help you determine what segment of the media you want to create a clip for, or where to trim your media. The Timeline features allow you to edit media with more precision to ensure that your clipping or trimming actions are in line with what you want as your result.
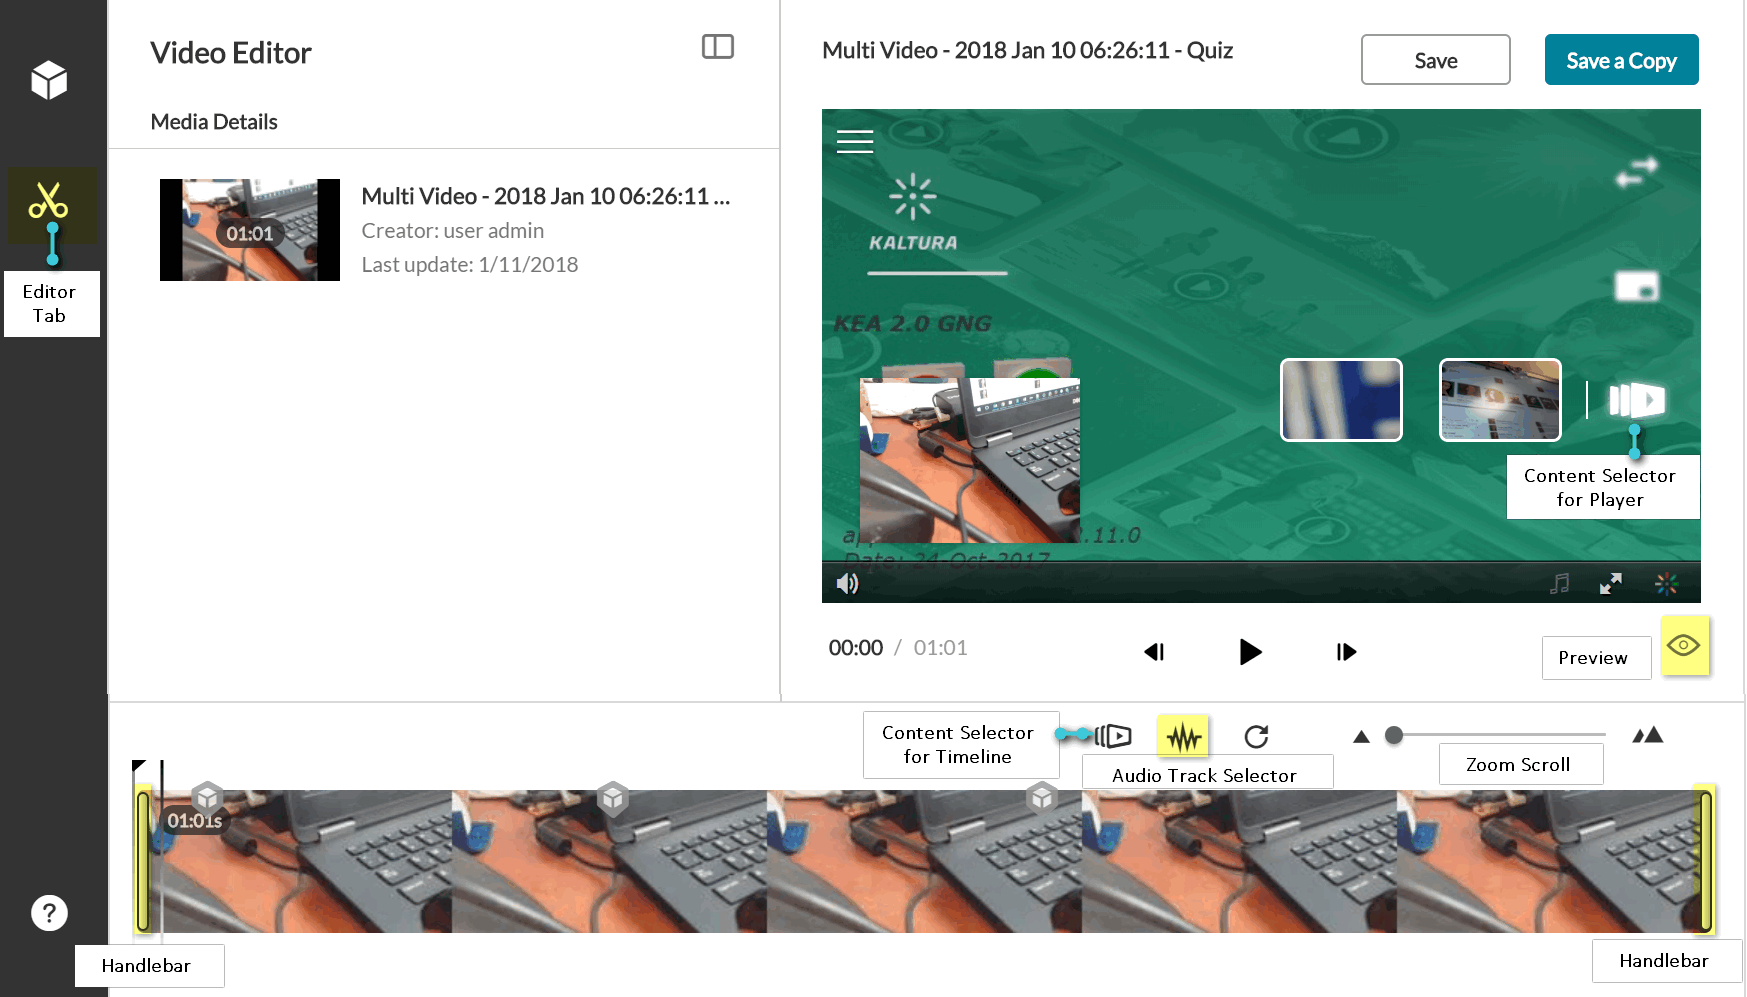
The Video Editor includes the following two icons that allow you to select the content that is displayed on the Timeline:
- Content Selector for Timeline – allows you to view the selected stream on your timeline.
- Audio Track Selector for Timeline – allows you to view each audio track associated with the entry, either individually or overlaid.
The Kaltura Video Player is independent of the Kaltura Video Editing Tool Timeline.
Clipping and Trimming Media with Multiple Video Streams
When the editor displays content with multi-streams, the Timeline is loaded with the primary stream. If you change the display on the player, it has no effect on the Timeline.
To select the segment for multi-stream content
- In a Canvas course, select My Media and select a video. Click Actions > Launch Editor. The Kaltura Video Editing Tool screen is displayed.
- Select the Edit Tab and click the Content Selection icon to view the stream(s) in the Timeline. The timeline will display the stream you selected and allow you to view where you will clipping or trimming the media simultaneously for each stream.
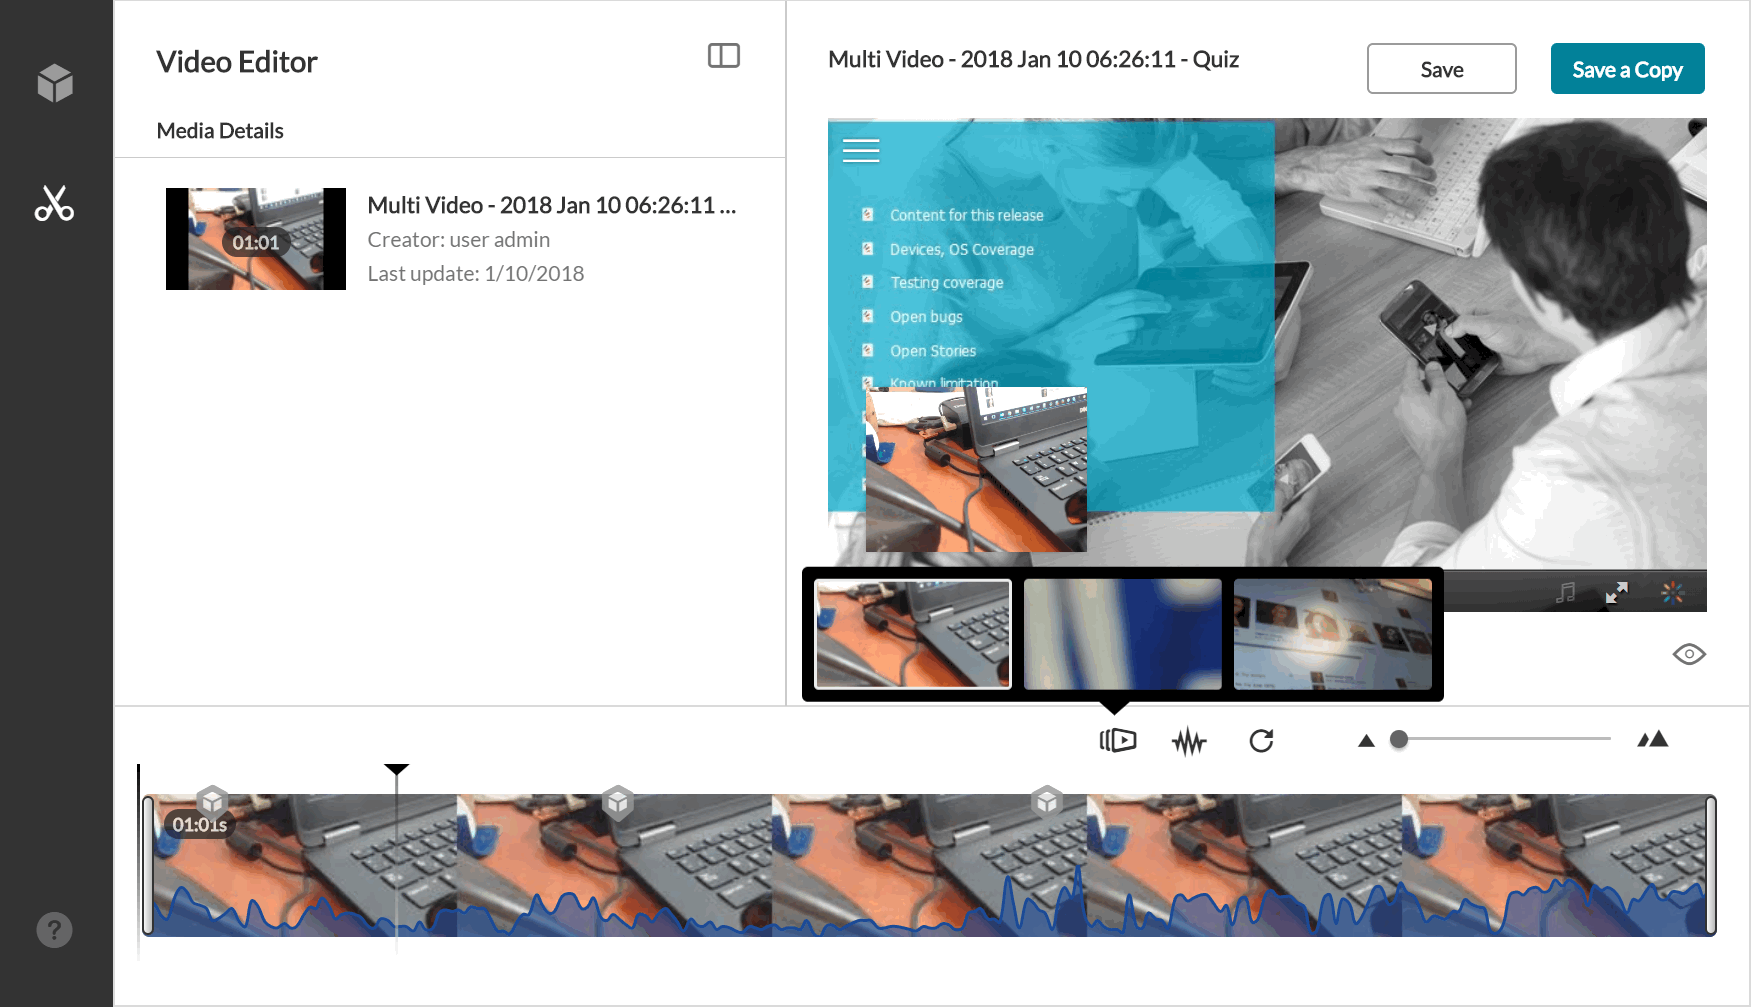
The following screen shows the first stream selected on the timeline at minute 00:10.
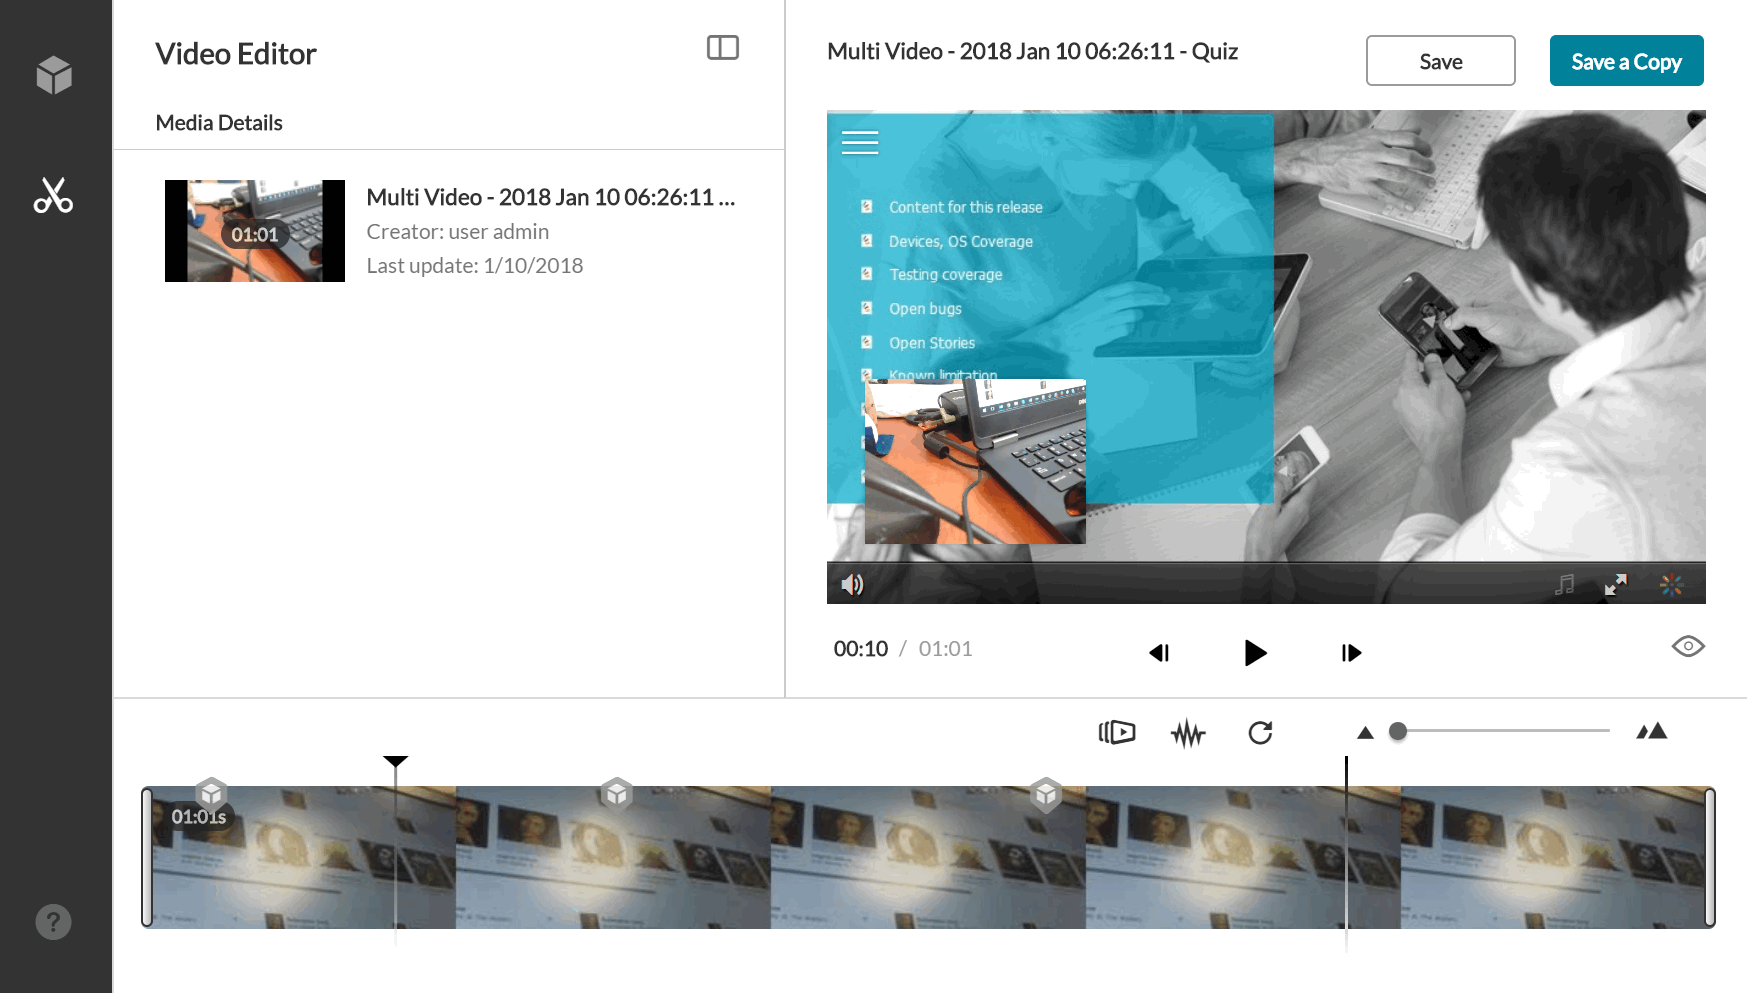
The following screen shows the third stream selected on the timeline at minute 00:10.
- Use the handlebars at both ends to move to the point in the segment where you want to trim or clip the content.

The clip duration is shown is the timeline. In this example, it is 10 seconds.
- Click on the segment in the Timeline to see actual time in the video.
- Use the zoom scroll to enlarge and assist you with the display granularity. You can extend or decrease the segment to points that you want using the handlebars.
For example, in a lecture, you may want to cut out the first 10 minutes, since the lecture did not start on time. Or, for example, you may be at a sporting event and just want to have the portion of the video focused on where the action was.
- Click the Preview icon to preview your clip or trimmed media.
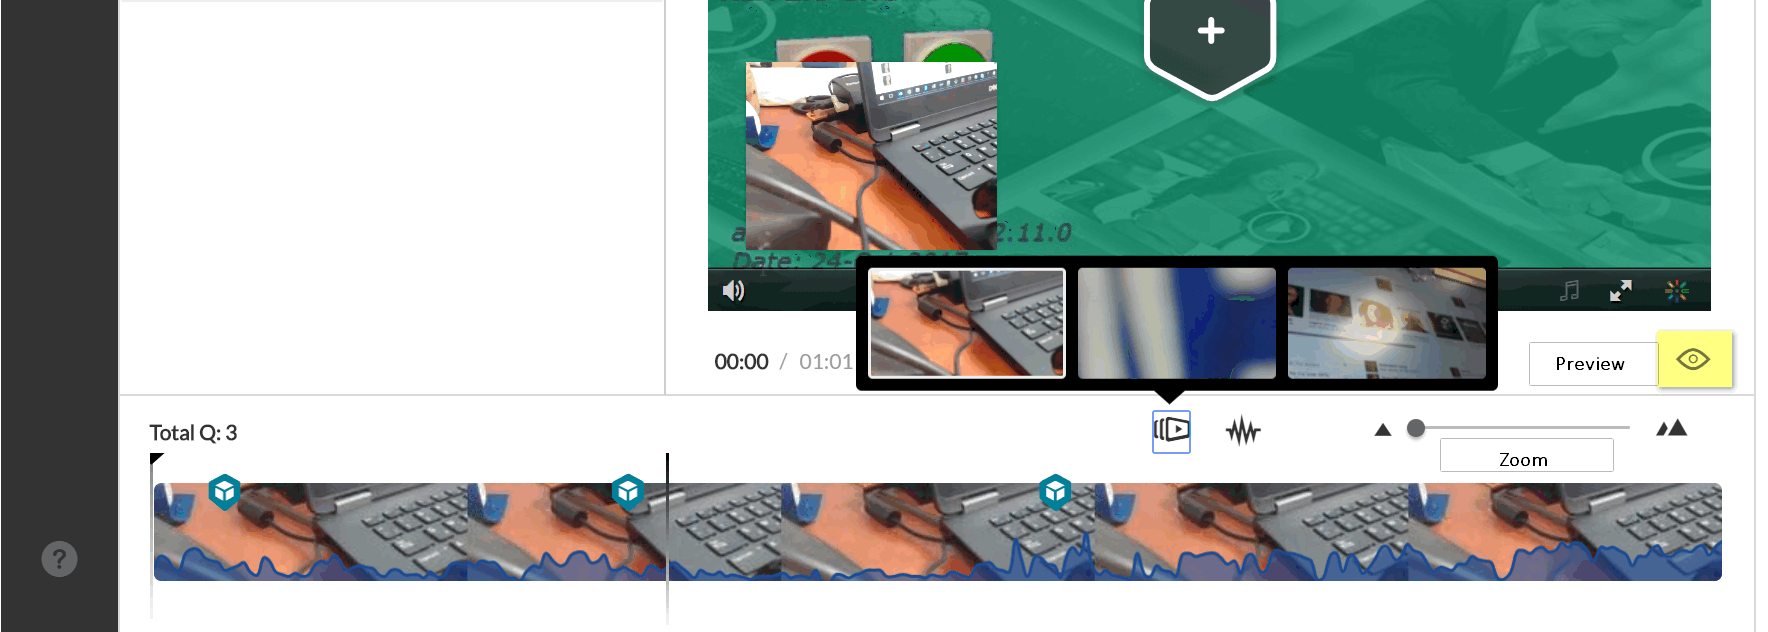
A preview of the segment is displayed.
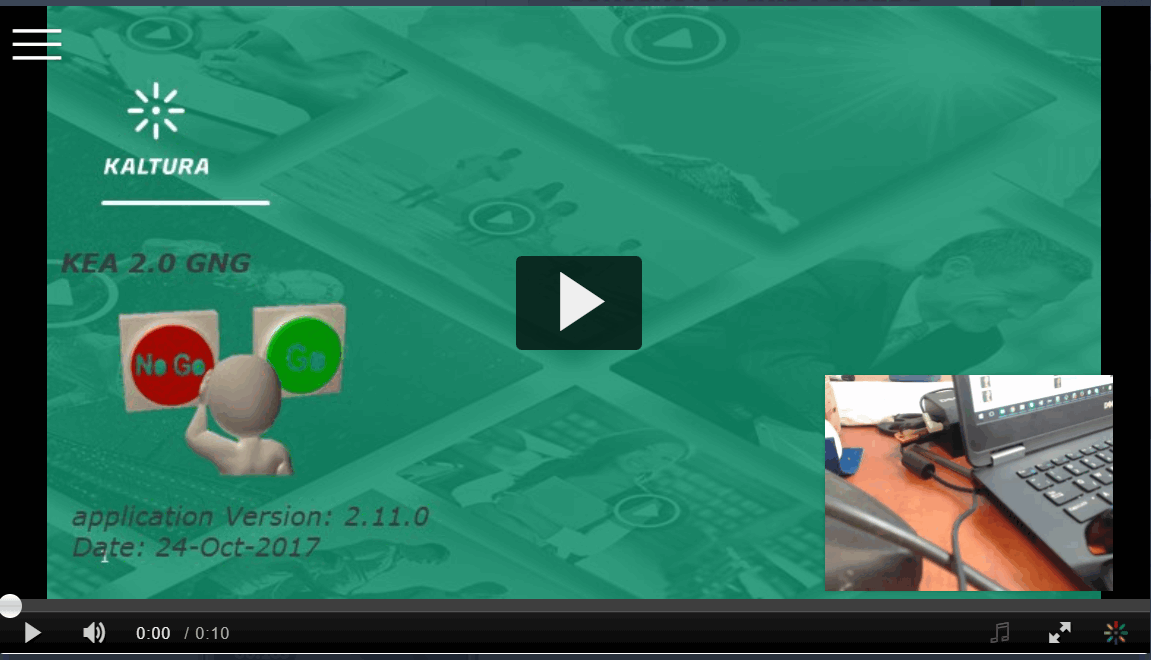
Note: The Preview always contains the first frame of the entry.
- Click Esc to exit Preview mode.
- When satisfied with your choice of the segment, click Save or Save a Copy.
The following screen is displayed to create a clip (Save a copy):
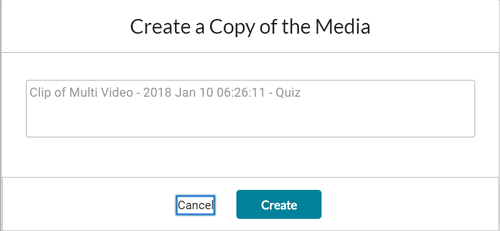
-
- Enter the new for the clip or use the default name and click Create.
The following screen is displayed when trimming content (Save):
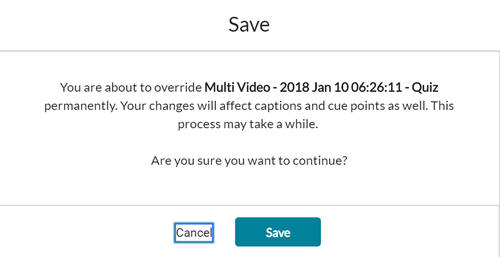
- Click Save.
The new media is created and uploaded to your MyMedia space.
Chop and Splice Media
Terminology
Chop and Splice - A chop, also known as a split, is referred to when you remove a section of your video clip. You cut the media in two places and lift out the middle section and join the other segments of the video back together (splice). For example, If you have a long video, you might want to chop/split it into sections to work with separately. When you join the two video clips together, you splice them.
The Real-Time Marker is used to cut and split the video segment.
Use the yellow handlebars to set the range of the video clip. See Setting the Range.

To Chop and Splice Media
- Move the Real-Time Marker to the point where you want to cut/chop the video.
- Click the Scissors to split/cut the video into two segments. You can repeat this step to create multiple segments on your timeline.

- Move the Real-Time Marker to the point in the timeline that you want to continue with, after you cut your first segment.

In this example there are three segments on the timeline and the intent is to cut out the middle section and splice the other remaining segments.
- Click on the segment that is to be removed and then click on the Trash icon to delete the marked segment. The Real-Time Marker may be moved and has no effect on the deletion of the segment.

The timeline is displayed without the "cut" segment.

- You can also move the Real-Time Marker to the point where you want your video segment to start and click the Set In icon. The timeline handlebars automatically move to the point where you want the segment to begin.

- Move the Real-Time Marker to the point where you want your video segment to end and click the Set Out on the scrubber. The timeline handlebars automatically move to the point where you want the segment to end.

- Repeat this process for each segment on the Timeline.
At any point, you can also move the yellow handlebars to extend the segment on the timeline.

To splice the video with fade out and fade in effects
- Click on the segment that you want to apply a fade-in or fade-out effect.
- Move the Real-Time Marker to select the fade in/out point on the Timeline.
- Click on the Fade In/Out icon and select the amount in seconds for the fade in/out.
- Click on the segment that you want to display as continuous and then select the fade in point on the Timeline. Click on the Fade In/Out icon and select the amount in seconds for the fade-in.
- Fade markers are indicated on the point of the segments to show where the fade-out and fade-in points begin. You can do this for each segment.

Questions? Need Help?
If you have questions or need some help, please let ITS know by submitting a Raven Solutions request.