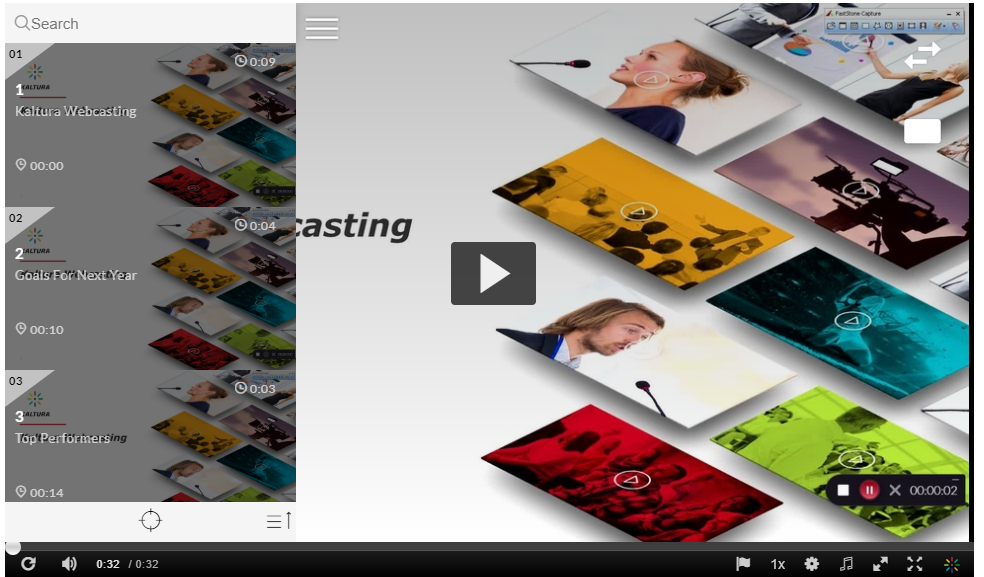
Overview
Users can record their screen, webcam, mic, audio coming from the computer or any combination using Kaltura Capture. Kaltura Capture is available for download by entering into MyMedia and clicking +Add New and selecting Kaltura Capture. The first time Kaltura Capture is selected users will need to download and install Kaltura Capture. Subsequently after installation, clicking Kaltura Capture will open up the Kaltura Capture app on the computer.
Kaltura Capture is available for both PC and MAC
Recording Camera and Screen
Camera and settings are set to the optimal quality available by default, so you can start recording. If you would like to change the camera or screen input or other settings perform the following steps: To set your camera and screen settings
- Click on the arrow next to the Video icon.
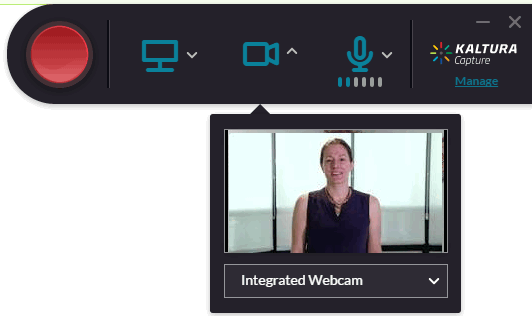
- Select the Input source (camera) you are going to record from, from the drop-down menu. If there is more than one camera connected to your PC, select the camera you want to record from.
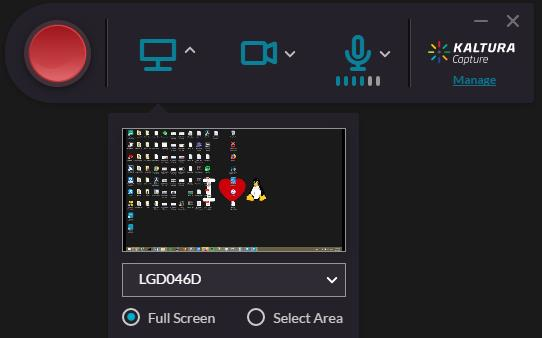
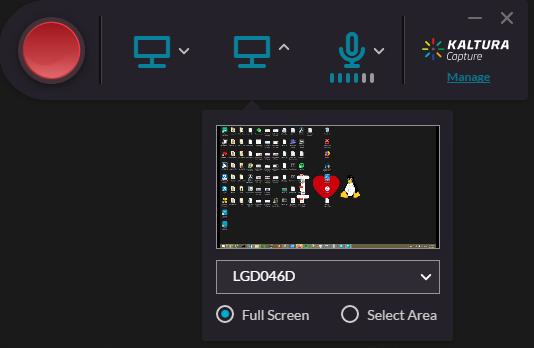
- Click on the arrow next to screen icon.
- Select the screen you are going to record from the Screen drop-down menu. If there is more than one screen connected to your PC, select the screen you would like to record.
- Click Full Screen to record the entire screen. Click Select Area to record a set area of your screen. Choose the relevant area or customize the screen area by resizing the cropping window.
Recording Your Camera
Camera settings are set to the optimal quality available by default, so you can start recording. If you would like to change the camera input or other camera settings perform the following steps:
To set your Camera input
- Click on the arrow next to the Video icon.
- Select the Input source (camera) you are going to record from, from the drop-down menu.
- If there is more than one camera connected to your PC, select the camera you want to record from.
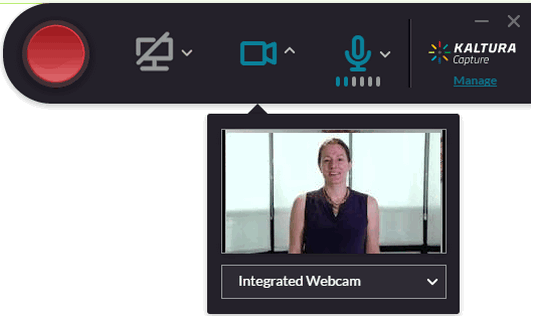
- Click on the second input to turn it off and record the camera only.
Recording Two Cameras
To set your inputs for two cameras
- Click on the arrow next to each input icon (camera or screen).

- Select the Input source (camera) you are going to record from, from the drop-down menu.
Recording Your Screen or Partial Screen
The input (screen or camera) drop-down menu contains a list of connected devices. Click on a different screen to change it.
Screen settings are set to the optimal quality available by default, so you can start recording. You can record your entire screen (full screen) or a portion of your screen.
To set your screen inputs
- Click on the arrow next to the input icon (camera or screen).
- Select the screen you are going to record from, from the drop-down menu.
- If there is more than one screen connected to your PC, select the screen you want to record from.
- Click Full Screen to record the entire screen. Click Select Area to record a set area of your screen display.
The cropping screen is displayed.
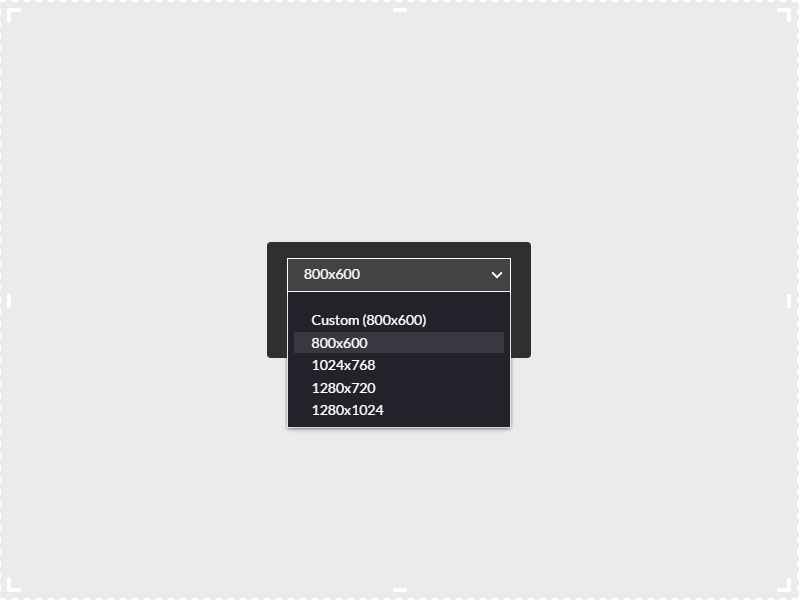
- Select an area from one of the options. The default area is 800x600 pixels. You can also customize the screen area you want to record by resizing the cropping window. Drag the frame to the size you want to record.
- Place the resized frame over the area of the screen that you want to record. Click Confirm and the frame turns red. Begin your recording. If you decide to cancel, toggle Full Screen under the screen selection.
- Click on the second input to turn it off if you want to record the screen only.
Recording a Presentation
When you record a slide presentation in Microsoft PowerPoint the Kaltura Capture application uploads the slides as chapters and indexes the text so it can be searched for in the video.When recording slides, Powerpoint must be in Slide Show mode. Powerpoint Viewer and Google Slides are not supported for Kaltura Capture recordings at this time.
To set your screen settings for recording a presentation:
- Click on the arrow next to the screen icon.
- Select the screen you are going to record from, from the drop-down menu.
- Start recording and change the slides.
After you save and upload your recording, the presentation is displayed with each slide representing a chapter. You can search for text through the content.
Recording Two Screens
To set your inputs to two screens
- Click on the arrow next to the inputs icon
- Open the input drop-down menu and select the second screen from the list.
- Select Full screen or Select area of your screen you want to record.
Recording Audio Only
To set the Audio input
- Disable both input icons that appear on the Recorder by clicking on them.
- Click on the arrow next to the Microphone icon.
- Select the audio source you are going to record from, from the drop-down menu. If there is more than one microphone connected to your PC, select the microphone you want to record from the drop-down menu.
- To include PC audio. Click Manage and then click the gear icon and toggle Record System Audio

Questions? Need Help?
If you have questions or need some help, please let ITS know by submitting a Raven Solutions request.