Overview
SRT files are captions files that users have created for a video. In order for the caption to play correctly, the user must use specific formatting in order for the computer to recognize the text as a caption file. A caption file can be created using Word but must be saved as a .txt file type in order to be converted into a SRT caption file. For specific questions regarding accessibility, please reach out to the Kissinger Academic Center for Excellence.
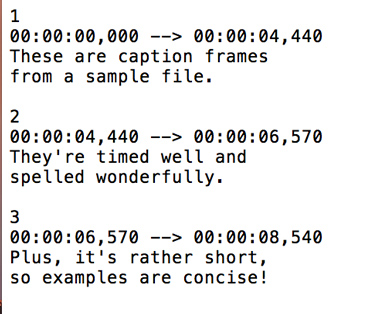
An SRT file consists of four parts:
- The number of the caption frame in sequence
- Beginning and end timecodes for when the caption frame should appear
- The caption itself
- A blank line to indicate the start of a new caption sequence
The time format used is hours:minutes:seconds,milliseconds, with the milliseconds rounded to 3 decimal places. Each timestamp is separated by a two-hash arrow (“– –>”) and a blank line before the next caption sequence.
A .SRT caption file can be created using both Windows and Mac Operating systems, the process will will be slightly different depending on the operating system but the general method will be the same. If you have already created the caption file using Microsoft Word or Google Docs then the file will need to be saved in a Plain Text Format and opened in Notepad and then saved again using .SRT at the end of the file name in Notepad. It's best to create the caption file directly in Notepad or copy and paste from Microsoft Word or Google Docs directly to Notepad.
Creating the text in Notepad using Windows
1.Open a new file on Notepad.
2. To begin, type a “1” to indicate the first caption sequence, then press “enter.”

3. Enter the beginning and end timecode using the following format:
hours:minutes:seconds,milliseconds ––> hours:minutes:seconds,milliseconds
Then press “enter.”
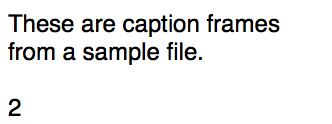
4. In the next line, begin your captions. Try to keep a 32-character limit, with 2 lines per caption so that the viewer doesn’t have to read too much and the caption doesn’t take up too much space on the screen. Also, make sure your captions are compliant with captioning guidelines.*
5. After the last text line in the sequence, press “enter” twice. Make sure to leave a blank line to indicate a new caption sequence.
6. Below the blank line, type “2” and begin your second caption sequence following the SRT captioning format.
7. Repeat the steps until you have a completed transcript.
8. To save, go to File → Save.
9. Under “File Name,” type the name of your transcript using “.srt” at the end.
10. Under “Save as type:” select “All Files.”
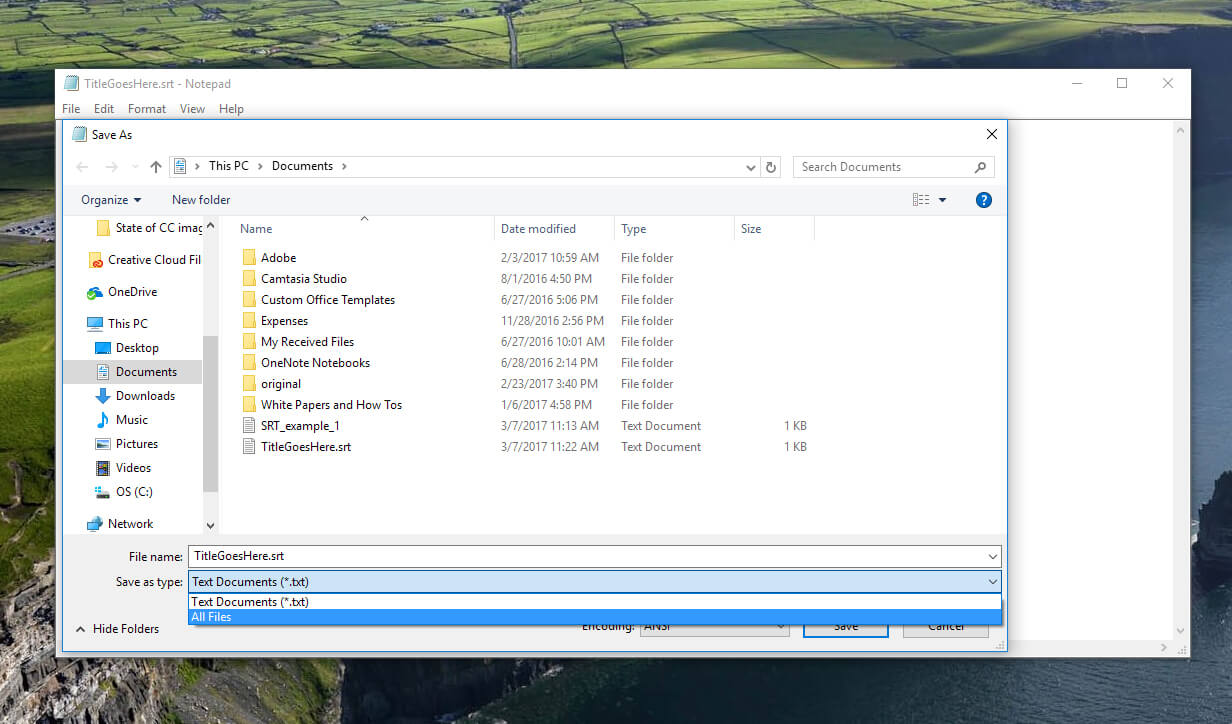
11. Click Save and you will now have a caption file that can be uploaded to a a video.
For Mac Users
1. Open a new file in TextEdit.
2. To begin, type a “1” to indicate the first caption sequence, then press “enter.”
3. Enter the beginning and end timecode using the following format:
hours:minutes:seconds,milliseconds ––> hours:minutes:seconds,milliseconds
Then press “enter.”
4. In the next line, begin your captions. Try to keep a 32-character limit, with 2 lines per caption so that the viewer doesn’t have to read too much and the caption doesn’t take up too much space on the screen. Also make sure your captions are compliant with captioning guidelines.
5. After the last text line in the sequence, press “enter” twice. Make sure to leave a blank line to indicate a new caption sequence.
6. Below the blank line, type “2” and begin your second caption sequence following the SRT captioning format.
7. Repeat the steps until you have a completed transcript.
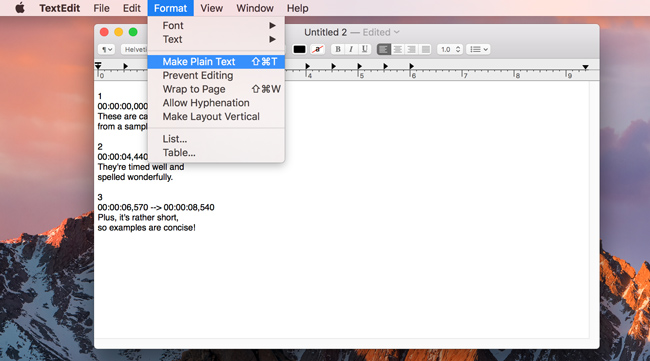
8. To save your file as an .srt, first go to Format → Make Plain Text, or use the keyboard shortcut: Shift + Command + T.
9. Next, go to File → Save
10.Under “Save As,” type the name of your file, but switch “.txt” to “.srt”
11. Uncheck both “Hide Extension” on the bottom left hand side of the menu, and “If no extension is provided, use “.txt””.
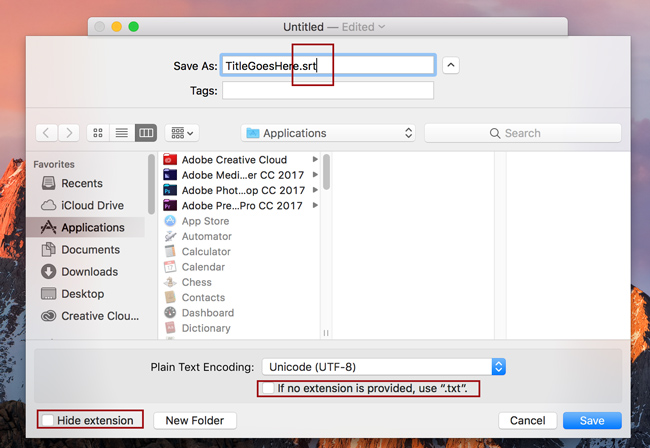
12. Then click save.and you will now have a caption file that can be uploaded to a video.
Converting a Word Doc to Notepad (.txt)
If you have created the file using Microsoft Word or Google Docs then you will need to save the file format as a .txt. file so it can be recognized as a caption file.
Click on File and then Save As and choose a Save Location (Desktop is recommended)

Name the fiile and Choose Save As type: Plain Text and click Save to save the .txt file

Press OK to save the .txt file (do not change any of the settings).

After you have saved the file, right click and open the file with Notepad

Verify formatting is correct in the notepad.
- Number line
- Time stamp -->time stamp
- Caption

Save complete caption file by clicking File → Save.
Under “File Name,” type the name of your transcript (name your transcript) using “.srt” at the end (noted: .srt is enlarged for instructional purposes) reallycoolcaption.srt
Under “Save as type:” select “All Files.”
Click Save and you will now have a caption file that can be uploaded to a video.
To learn more about Uploading a caption file to a Kaltura Video, click here.
Questions? Need Help?
If you have questions or need some help, please let ITS know by submitting a Raven Solutions request.